Horse Exercisers and Track Covers

MADE IN THE USA, SERVING THE GLOBAL EQUESTRIAN COMMUNITY

Author Archive

Western Horse Fitness

A good program for the Western Horse Fitness will improve his athleticism, by strengthening his muscles while developing balance and self-carriage. Another important aspect is keeping him alert and happy in his job.

Each training session should start with loosening and warming up the horse correctly before moving onto exercises which work different areas of his body.

Loosen Up Your Horse

Purpose of Loosening-Up

Jec Ballou is nationally recognized as an educator on equine conditioning and gymnastic development. In Western Dressage Exercise – Controlled Wandering, she stresses the importance of warming up the horse properly before asking him to perform more strenuous movements.

She points out that when a horse is at rest only 15% of his blood flows to the muscles that move his limbs.

During exercise this percentage rises dramatically to 85% as blood is transferred from his organs and metabolism to the larger skeletal muscles. This provides them with the power to move more energetically.

But this transfer does take several minutes. The horse’s body first needs to be loosened up slowly and gently to increase the blood and joint fluid circulation.

This will keep your horse supple and easier to ride as well as reducing his risk of injury.

Your horse can also relax at the beginning of every ride, knowing that he has time to ‘chill’ before more exacting work is demanded of him.

How to Loosen-Up Your Horse

Ms. Ballou suggests riding your horse on the buckle when you first start out. She calls her system “controlled wandering” and it consists of moving leisurely around the arena “in creative loops and turns,” riding figures and patterns not normally included in your daily work routine.

Remember, this is his time to take it easy. Relax in the saddle and allow the horse to amble comfortably with guidance from your seat and legs rather than your reins, and don’t try to get him ‘on the bit.’

Ms. Ballou also advocates loosening the horse up with “calisthenics (backing up, carrot stretches, stepping over ground poles).”

This phase should take five to eight minutes, but an older horse will benefit from even longer. After this, the rider progresses to the warm-up.

Warming-Up Your Horse

Purpose of Warm-Up

Ms. Ballou emphasizes that this is a separate phase from loosening-up. Its purpose is to increase the horse’s body temperature and makes him suppler.

How to Warm-Up

Warm-up consists of steady, energetic exercise and “should be plenty active—brisk jogging, lope transitions, circling, transitions.”

Once your horse is moving happily forward, supple and ‘engaging his back’ he is ready for the day’s training routine.

Dressage Training Can Get Your Western Horse Fit

Dale Rudin notes that regularly riding basic dressage movements will increase your Western horse’s athleticism and fitness, while making him more flexible. It will give him “greater endurance and resistance to injury.”

He reminds those who are intimidated by the term ‘dressage’ that it simply means ‘training’ in French and says: “Just do it, and reap the benefits in enhanced performance.”

First Bend Your Horse

Purpose of Bending Your Horse

Mr. Rudin explains that bending your horse creates softness and suppleness in his entire body, which must be achieved before performing any other exercises.

The horse’s body should be “perfectly aligned from head to tail, mirroring the shape of the arc, arena corner or any other curving path that he travels.”

How to Bend Your Horse

He should be ridden in a snaffle, with you sitting balanced in the saddle. Your contact should be the same in both reins: the inside rein bends the head and neck of the horse, and establishes the degree of bend.

Your outside rein provides the outer limit of the bend to stop over bending. The horse should move between a channel formed by your reins.

Figures of eight ridden at different speeds, sizes and gaits will stretch and supple your horse’s muscles and make them more flexible.

See The Bending Horse and Rider for more on how to correctly bend your horse,

Two-Tracking aka Leg-Yielding

Purpose of the Leg-Yield

This is one of the lateral movements which build the horse’s topline and hind end. As Mr. Rudin explains, the horse uses the muscles in these areas for the slow, collected paces. Thus lateral work is “indispensable” preparation for “tasks such as lope transitions, pivots on the front and hind ends, and lead changes.”

He describes the leg-yield as “like a sidepass on the go” where the horse has to move sideways and forwards at the same time. It is more easily performed in walk and trot, but a well-balanced horse can leg-yield in canter.

In addition to strengthening his back and hind end, this exercise loosens up the horse’s shoulders and his front end becomes lighter. The result is better balance and longer strides, and the horse moves with more expression.

How to Leg-Yield

The leg-yield should be performed in a snaffle.

For a leg-yield to the left, ride your horse down the center line, flex his head to the right, keeping outside left rein contact, and nudge him over with your right leg just behind the cinch. His right front and hind legs should cross in front of his left legs while he moves forwards and laterally.

Ask your horse for a gentle sideways line of travel with his body straight. If his quarters trail, stop the movement, straighten him out for a few strides, and ask for leg-yield again.

Shoulder-In

Purpose of the Shoulder-In

The shoulder-in is another great way to strengthen and loosen up your horse, and make him more flexible. This movement shifts weight off his front end and transfers it to his hind end.

The result is improved self-carriage, which is a pre-requisite for collection. Without collection your horse will be unable to perform – among other things – his lead changes.

As Ludvik K Stanek explains in Collection: Balance/Energy, collection is achieved when the horse is in balance under his rider, who ‘collects’ his mount’s energy (containing it with his seat, legs and hands) thereby creating the impulsion the horse needs to perform difficult tasks with greater ease.

Collection requires strength in the horse, and the shoulder-in targets the muscles he uses to achieve it.

How to Perform the Shoulder-In

This is usually ridden on the rail. The horse shifts his shoulders inwards and moves forwards on three tracks.

His inside foreleg is on one track, his outside foreleg and inside hind leg are on a second track, and his outside hind leg travels on the outside track.

Maintain your horse’s bend, and bring his shoulders in by moving both reins inwards. In the beginning your outside rein will probably lie on his outside withers while your inside rein stays next to his withers.

Your seat should be parallel to the line of his shoulders, your inside leg applies pressure on the cinch, and your outside leg is slightly back to keep contact with the center of his ribcage.

Don’t make the angle of the shoulder-in too steep (otherwise the horse will be working on four tracks in a virtual leg-yield) and ensure that he stays bent round your inside leg to get the maximum benefit from this exercise.

The Western horse needs to be athletic and strong, balanced and in self-carriage to do his job happily with the minimum risk of injury. The above exercises will increase his fitness, enabling him to work efficiently in relaxed co-operation with his rider.

Resources & Further Reading

Jec Ballou

Western Dressage Exercise – Controlled Wandering

How to Engage Your Horse’s Back

Bodybuilding for the Western Horse:

Use bending and suppling exercises borrowed from dressage to improve your western horse

The Bending Horse and Rider

Dressage Exercise – Leg-Yielding

Shoulder-In

Dressage Exercise – Shoulder-In

Collection: Balance/Energy

Stretching Exercises for Your Horse

Western Pleasure Calisthenics Part I

Western Pleasure Calisthenics Part II

Western Pleasure Calisthenics Part III

Western Pleasure Calisthenics Part IV

Western Dressage Training

A series of articles about Western Dressage training

Posted in: Equestrian News, Horse Care

Leave a Comment (0) →

Fitness Tips Jumper Rider

Fitness Tips Jumper Rider

The forwards riding position required in jumping “necessitates weight bearing to be through the rider’s legs,” according to a study of the physical demands on equestrian athletes.

This position also requires high levels of “tonic muscular contraction, particularly of the trunk” which “incorporate(s) some anaerobic demand.”

A program for condition the body for optimum show jumping performance must therefore strengthen the torso and legs as well as improving stamina for a jumper rider.

Exercises for the Torso

1. The Plank

In Exercises for Showjumping Jo Jackson explains that “plank exercises are good for showjumpers.”

Start with the pushup position, leaning on your forearms. Straighten the spine and pull in your stomach, then hold yourself up for 15 seconds, with toes and forearms touching the floor.

Perform 15 repetitions, lengthening the time you hold yourself up as your fitness builds.

Other exercises to improve torso strength include:

2. The Side Plank

3. The V-Sit Abdominal Exercise

4. The Bridge Exercise

Exercises for the Thighs

1. Trotting Without Stirrups

Jo Jackson recommends trotting without stirrups.

Cross your stirrups over the pommel of the saddle. Keep your legs in the correct position and ask the horse to trot.

Ride in rising trot for as long as you can, with your heels down, just as they would be in the stirrups.

Initially this will be tough to maintain, but you’ll gradually be able to perform this exercise for longer periods.

2. Trotting in the Jumping Position

A favorite among event riders, this exercise improves the rider’s balance in the saddle as well as strengthening the thigh and calf muscles. It also flexes the ankles.

With feet in the stirrups, trot the horse while sitting in the forward jumping position. Look ahead, as if you were approaching a fence, without coming back down into the saddle.

You’ll be able to sustain this for longer as your thigh muscles become stronger.

Exercises for the Calves and Ankles

1. Stair Exercise

Stand on the first step of a flight of stairs, with the balls of your feet on the edge of the step and your heels hanging over the edge.

Slowly lower the heels of your feet until your calves are stretching, and hold for 10 – 15 seconds, then raise your feet above the height of your toes.

Perform 10 reps.

2. Balance While Standing

Brooke Yool in Simple Calf and Ankle Strengthening Exercises advocates balancing on one leg to work “the small stabilizing muscles surrounding your ankle and the base of your calf, helping you prevent sprains. Work up to balancing 60 seconds on each leg, once per day.”

These two exercises combined will strengthen your ankles and improve your balance.

Developing Stamina

Showjumping riders should build their stamina with thrice weekly cardio exercises, according to M. L. Rose in Exercises for Showjumping. These should be vigorous and can include riding, but additional options are walking briskly, jogging, swimming, playing squash and biking.

Showjumping requires good physical fitness. Strengthening exercises on the legs and torso will improve your balance and stability in the saddle, while stamina training will enable your body to compete without becoming stressed. Always consult your physician before beginning any exercise program to make sure you can safely perform an exercise program.

Resources & Further Reading

A systematic review of physical fitness, physiological demands and biomechanical performance in equestrian athletes

Exercises for Show Jumping by M.L. Rose

Exercises for Showjumping by Jo Jackson


Posted in: Equestrian News

Leave a Comment (0) →

Show Jumping Horse Fitness

English Riding: Show Jumping Horse Fitness

A show jumping horse faces multiple physical challenges: he needs sufficient speed and stamina to navigate the course, explosive take-off power, and good technique over fences.

To be successful, a conditioning program for the show jumper has to address the horse’s overall strength and fitness while improving his jumping style.

Brief Outline of the Fitness Program

The first stage is aerobic training, where the horse’s heart, lungs, muscles and other soft tissue are slowly strengthened.

In Fitness Training for a Show Jumper, Ellen Whitaker, Silver medalist for the United Kingdom (and niece of famous show jumper John Whitaker) stresses the importance of reducing the risk of injury and keeping the horse happy in his work: “For this reason I like to give my horses plenty of time to achieve the necessary levels of fitness and always keep their training varied.”

Mark Sellers quotes Hilary Clayton, a professor at the College of Veterinary Medicine at Michigan State University, who says this phase can last between 6 and 12 months before the young horse is ready for the next stage, which is anaerobic conditioning.

For the older, trained horse, regular jumping can be incorporated into the later part of this phase. The young horse should be introduced to obstacles once his aerobic and anaerobic training are complete. When they also incorporate correct flatwork, both types of conditioning build his muscles properly and bring his body into balance under his rider.

Aerobic Training

Being ridden at working trot and canter form the exertion part of the horse’s aerobic training, while walking serves as his rest period. Professor Clayton recommends a work to rest ratio of 1:2.

Ms. Whitaker advocates “plenty of trot work to improve overall fitness and also to build up muscular strength.” She adds that “hill work is great for building the hind quarters,” and stresses the importance of riding in a correct outline all the time to work the right muscles, even when out on the trail.

The horse is gradually asked to travel over greater distances, while keeping his heart rate lower than 150 bpm.

This phase develops the horse’s lung capacity and teaches his body to utilize oxygen more efficiently.

Anaerobic Training

After approximately one month of aerobic work, the horse moves onto anaerobic interval training.

Mr. Sellers explains that the heart rate should be brought above 150 bpm by working the horse at higher speeds for brief time spans: “periods of acceleration and deceleration (to) move the heart rate above 160 bpm for short periods.”

Ms. Whitaker points out that one minute of intense power is needed to complete a round of show jumps, unlike most other horse sports. The “intensity, duration and frequency” involved in interval training are useful to the show jumper because they “simulate actual competition demands.”

Interval training incorporates frequent “high intensity exercise for short durations” which develops the “efficiency of the anaerobic energy pathways,” says Ms. Whitaker. She explains that “The powerful muscular contractions involved with each jumping effort rely totally on anaerobic energy pathways.”

A study on the effects of interval training on show jumping horses concluded that while all types of interval training “improved parameters of fitness,” the gallop and jump interval exercises were more beneficial than bouts of sprint work. Interestingly, the gallop work improved the horses’ jumping techniques just as much as actual jumping did.

Jump Training

More Experienced Horses

Ms. Whitaker includes gymnastic jumping in the anaerobic phase for “improving fitness, rhythm and co-ordination.” In gymnastic jumping the horse goes over a line of jumps and ground poles in various configurations. This is an excellent way to build the horse’s confidence over fences, whether he’s had time off or is just beginning his show jumping career.

Her “main focus is always gymnastic ability and power, although not forgetting speed which is just as important in some classes.”

It is important not to over-jump the horse. Training over obstacles for approximately 20 minutes at a time, twice a week, should suffice “to develop your jumping to the required standard” and allow time to practice over a full course of fences.

Once the competition season has begun, Ms. Whitaker doesn’t normally jump her horses between shows “to give the muscles etc. time to recover after strenuous work.”

The Young Horse

A young or inexperienced horse needs to be trained with patience and understanding. Karsten Huck, German Olympic Bronze Medalist, advises taking it slowly, “and never, never push a horse too hard or overwhelm it.”

The horse must be properly schooled on the flat, able to accept the rider’s aids, forward going and straight. He is not ready to jump until he is balanced underneath his rider.

Herr Huck always begins work with one ground pole then moves up to cavaletti. He asks the horse to trot over them until the animal can “stay in balance in front, as well as on the landing side, of the jump.”

Cantering over the obstacles is introduced only when the horse’s back and hind legs have developed sufficient muscle.

This slow, methodical approach is essential to the horse’s chance of a successful future in show jumping. Herr Huck says, “My saddest moments are when I come across a talented horse that has not had the privilege of receiving appropriate education.”

Patience, the Essential Training Tool

There is no set time period for conditioning the show jumper: each horse has individual requirements. Some horses need more time than others to get fully fit, and their training must be adjusted accordingly.

Setbacks are inevitable: your horse may injure himself or the weather may not co-operate with your intended schedule. Prepare to be flexible with your competition calendar should your horse not be ready for the show you originally planned for him.

Whether bringing a seasoned campaigner back into work or starting a young horse, it’s important to start with aerobic exercises to strengthen the horse then progress to anaerobic work to prepare him for producing sudden bursts of power. Together with practice over fences, this methodical approach will afford him the best chance of success in his show jumping career.

Resources & Further Reading

Fitness Training for a Show Jumper

Horse Conditioning – A Look at the Show Jumper

Effects of training with different interval exercises on horses used for show jumping

Karsten Huck Has A System For Training Young Jumpers

Cavaletti

Posted in: Equestrian News

Leave a Comment (0) →

Rider Symmetry Exercises

English Riding: Rider Symmetry Exercises

If you haven’t ridden before or are switching disciplines, you’ll find the rigors of dressage much easier with targeted preparation.

Swimming and cycling are excellent ways of achieving the necessary physical fitness. But you can gently condition specific riding muscles and improve rider symmetry in your own home.

Straight Talk

A dressage horse should travel straight. But equines are naturally crooked, and we often exacerbate this, because our horse reflects how his rider is sitting. If we sit crookedly, he has to move awkwardly to compensate for our lack of straightness.

Achieving Symmetry

Like horses, humans tend to have a dominant side. If we are right-handed, this translates into being ‘right-legged’ when we get into the saddle. We sit to one side, exert more strength with our right hand and leg. Meanwhile our left sides are weak and ineffective.

Jon Pitt has developed exercises for discovering your dominant side and training your body to become symmetrical. To simulate the horse, he uses a Rider Stability Ball to develop the balance and core (torso) strength so essential for good dressage.

You can use any exercise ball, such as the inexpensive ($10) Gold’s Gym 55 cm Anti-burst Body Ball, also available in 75 cm, or Tone Fitness 65cm Anti-burst Stability Ball.

Recommended sizes are: 55 cm ball for those 5’7” and under, 65 cm ball for those 5’8” – 6’ and 75 cm ball for those 6’ and over.

To find your dominant side:

1. Sit on the ball with your legs in front as if you were on a chair, and raise one leg off the ball.

2. Replace that leg and raise the other one.

First, you automatically raised your weaker leg, and have now raised your dominant leg. The weaker one is having a harder time supporting you.

Practice this to strengthen your weaker leg.

Open Hips

Relaxed, open hips allow the horse to move freely under the rider.

1. Sit with your legs on either side of the ball, as if you were on the horse.

You’re now opening your hips and adapting them to a wider angle. Since you’re not actually on a moving horse, you can be more relaxed and your hips won’t stiffen.

2. If you’re new to riding, don’t stay too long in this position. Start for 30 seconds or so, and increase the time every other day, to allow your muscles to recover between sessions.

Pelvic Tilts

This exercise teaches the rider to move the pelvis with the horse’s motion, and develops correct posture in the saddle.

1. Still in the riding position, tilt your pelvis forwards, ‘closing’ your belly button.

2. Then tilt it backwards, creating a hollow, arched back.

3. We riders tend to sit in one of those extreme postures, but the ideal position is in between. Practice keeping your torso straight, but not rigid.

Achieving Balance

Sit centered on the ball and take your feet off the ground.

It’s tricky to do at first, but over time you’ll be able to keep your upper body straight while your pelvis moves under you for balance.

Practice these exercises every other day to help build correct muscle strength and achieve symmetry in the saddle.

By developing a soft, independent seat, you’ll allow the horse to move forward with freedom, straightness and balance. This is the hallmark of a good dressage rider.

Resources & Further Reading

10 Reasons to Use an Exercise Ball as Your Chair

Rider Fitness Tip of the Month: Improve Your Dressage Seat, Stabilize Your Pelvis

Fit to Ride Dressage

Jon Pitts’ Fit to Ride Videos:

https://www.youtube.com/watch?v=okNaMhr7TKk

https://www.youtube.com/watch?v=eOizDH3H1_E


Posted in: Dressage, Equestrian News

Leave a Comment (0) →

Dressage Horse Fitness Program

English Riding: The Dressage Horse Fitness Program

All equine fitness training should be carried out slowly and with consistency, and this is especially true for the dressage horse.

In her excellent book Equine Fitness, Jec Aristotle Ballou stresses that it can take as long as 12 months for a horse to become fit enough to be ridden in walk, trot and canter for a full hour. And yet most riders expect their horses to perform this long after only a few months.

Schooling Does Not Equal Conditioning

Schooling a horse may teach him dressage movements, but it doesn’t improve his physical ability to perform them.

Without incorporating proper strength and conditioning exercises into every work session, your horse will never become strong enough to go up the levels of dressage. Instead he will become stiff with tight neck muscles and a weak back.

Ms. Ballou believes in the 50/50 rule for every session. Half the time should be spent on schooling and the other half used for conditioning work.

From Zero to Fitness in Three Phases

When conditioning the completely unfit horse, allow 4 months as a minimum and up to 7 months. Think about how much time you’d need to get into shape if you were starting from zero fitness! A horse is no different.

The First Two Months: Acclimation

If a horse has not been ridden for a long time, start with exercises on the ground for a couple of weeks. Calisthenics such as backing the horse uphill (beginning with a few steps) coupled with leg and neck stretches are useful.

Equine Stretches should be performed on muscles that have already undergone a short warm-up routine, or after a workout, according to Dr. Christine Woodford of Veterinary Integrative Performance Services. This is “because the soft tissue is more elastic, easier to stretch, and less likely to be damaged.”

If you have access to a horse exerciser, you can warm him up on it before you begin his stretching program.

Dr. Woodford advocates starting slowly and gently. Never force the horse to stretch if he resists: “Simply stop and ask again.” Overdoing it can injure him, so don’t go beyond what he’s comfortable with.

Stretching exercises are a good way to improve the flexibility of your horse over a period of time. Dr. Woodford’s instructions for neck stretches, front and back leg stretches and back stretches are accompanied by photos.Horse Stretch Front Leg

Perform these for 10 to 15 minutes on alternate days for at least 3 days a week, then start riding for 25 minutes at a time beginning with walk. Every 10 days gradually increase the duration and intensity of the exercise. Add short trot sessions after the first 10 days, and finally some canter after the second 10 day period.

You will begin to notice your horse shedding his extra pounds and becoming more muscled.

The Next One to Three Months: Cardio

The basic cardio workout for your horse usually takes 4 weeks but can require 12 weeks or even longer. It focuses on building stamina, so plan to ride 4 or 5 days per week.

Gina Krueger, in Conditioning the Dressage Horse by Gina Krueger explains that “Cardiovascular fitness is derived from repeated muscle contractions that increase the use of the oxygen provided to the blood stream via the lungs. Cardiovascular training is thought of in terms of Heart and Lung capacity.”

She advocates riding cross-country – especially cantering – as “the best cardiovascular exercise you can give your horse,” as well as “two shorter workouts per day (which) also increases significantly his cardiovascular reserve.” His cardiovascular fitness will increase if you frequently change direction and perform transitions “because the horse must overcome forces of inertia.”

This avoids the problem of lactic acid building up in the muscles, which adversely affects the horse’s performance.

In Is Your Horse Fit for the Task? Ray Geor, BVSc, PhD, Dipl. ACVIM explains in detail how to assess your horse’s fitness level. This will tell you when your horse has completed his cardio conditioning program.

Ms. Ballou emphasizes that your horse should “carry himself properly in the correct posture” by the end of this phase before moving onto the strength-building exercises. He must be “stretching his back, pushing nicely with his hind legs and carrying his spine in good balance.” Then he will get the most out of his conditioning and strengthening work.

The Final Two Months: Strength-Building

By now you’ll be schooling your horse in dressage for 2 to 3 days a week, devoting 1 day to maintaining his cardio-fitness. It’s now time to add strength training for an additional 2 days a week.

In Building a Stronger Dressage Horse, (The McPhail Chair Report #9) the McPhail Equine Performance Center states that simple lack of strength is the reason why many horses don’t reach their full potential. “Improvements in muscular strength not only enhance performance, but also prevent injuries by reducing the risk of muscular strains and through stabilizing the joints more effectively.”

Interval Training

Interval training works well for the dressage horse by having him perform “different types of exercise on successive days and by allowing easy days between strenuous workouts.” This avoids specific muscles being overloaded and causing injury.

The report suggests a ratio of work to recovery time of between 1:5 and 1:6. After executing high-stress dressage movements, the horse recovers by performing easy or suppling exercises for five to six times as long as he worked hard.

This allows the heart and lungs to partially recover, while dispersing some of the lactic acid build-up.

Strengthening Exercises

Specific strengthening exercises for your horse at this stage include:

  • Hill work: walking and cantering uphill (not trotting) as work, then walking back down for recovery.
  • Gymnastic jumping over fences of 18” – 24”: jumping a grid of bounces or one strides (work) and walking or trotting back to the start (recovery).
  • Repeating dressage movements which require strength, such as the canter pirouette, for a short time, followed by trotting on a large circle while suppling the horse with shoulder-in or travers before repeating.
  • You could perform this on alternate days, three times a week, adding more intensity/repetitions to the exercise each week until the horse is strong enough to perform the required repetitions of that movement.

Keeping Your Horse Fit

You will have now reached the phase in your horse’s conditioning where you simply need to maintain his fitness level.

Ms. Ballou advocates riding for at least 3 days a week, but preferably 4 or 5, to achieve this. At the same time stick to the 50/50 rule of working half the time on your dressage movements and the remaining half on your horse’s conditioning.

This will lead to a fit horse that is able to fulfill his athletic potential.

Resources & Further Reading


Equine Fitness by Jec Aristotle Ballou

This excellent book contains exercises for achieving total fitness in your horse.

Equine Stretches

Is Your Horse Fit for the Task?

Building a Stronger Dressage Horse

Cross Training for Successful Daily Rides

Strengthen to Lengthen

Conditioning the Dressage Horse by Gina Krueger

An Easy Equine Fitness Plan

Start Your Horse’s Spring Training

Safe Conditioning: A vet’s guide to equine fitness

Posted in: Dressage, Equestrian News

Leave a Comment (0) →

10 Safety tips using a Horse Exerciser

Owners often worry about the safety when using exerciser machines. If you choose the right machine and take sensible precautions, you can enjoy its many benefits without injury to your equine partner.

Here are 10 safety tips for horse exerciser safety.

1. Going Free-Style

The European type of horse walker, such as the EuroXciser, is a safer alternative than the traditional version. The horse is not tethered, with his head held in an artificial position, which can result in injuries to his back and his hocks.

He can’t get hung up on his lead rope and won’t feel restricted or try to break loose by pulling on it, stalling the machine and upsetting his equine companions.

Because he is allowed to move naturally and with freedom, he relaxes quickly into his exercise routine, and develops more correct muscling.

2. Sufficient Room

Choose a horse walker that offers a generous amount of space for the horse to move in.

With a machine such as the EuroXciser each horse has a work area of at least 30’ or more in length and 8’ in width. These measurements prevent him from feeling claustrophobic and panicking, and he has plenty of room to turning round in when you change the direction of rotation.

3. Nowhere to Get Stuck

Walls

Particular attention needs to be paid to the construction of the outer and inner walls of the walker.

They should be high enough to prevent the horse from being able to jump out, be very strong, and have no gaps big enough for him to get his legs, hooves or head stuck.

Here are examples of safe fencing, with the added advantage that individual panels or planks can be easily replaced.

Inside Partitions

The dividing partitions between each horse should have no areas where a horse’s hooves (or any other part of his anatomy) can get caught.

Lightweight and easily removable metal frames containing wire grids and a rubber base are ideal. A good example is the EuroXciser partition: horses are not only physically safe between them, but can also see their equine buddies on the walker and relax.

These frames can be connected to a fence charger, which is extremely useful if you have horses which persistently lean against the back panel and disrupt the work flow.

Another safe choice of partition is neoprene rubber, perforated to allow air flow and reduce overall weight. They are soft on flying hooves, but their one disadvantage is that they cannot be charged.

4. Smooth & Safe Engine

Especially for a horse not use to an exerciser, or of a nervous disposition and easily upset by loud noise, a quiet engine is a real bonus. Using a inline geared motor allows for whisper quiet operation, and not agitate a horse with unfamiliar noise. These type of drive trains also more reliable and require little maintenance.

5. Stopping in an Emergency

An emergency stop button on the outside controller is essential.

Knowing the walker can be stopped immediately if necessary will gives you additional peace of mind.

6. Surface

In order to relax in his work your horse must feel secure and comfortable going round the track. One of the biggest ways to keep him safe on the horse walker is good footing.

You never want to exercise your equines on a concrete surface. It’s easy for them to slip on, is hard on their hooves and can cause severe concussion injuries. Concrete becomes even more dangerous when covered with droppings or rained on.

The footing you choose should provide sufficient traction and absorb impact. Excellent choices include soft sands with rubber additives.

Rubber mats underneath the footing add extra cushioning. They should allow adequate drainage and be properly secured so they don’t move under the working horse.

7. Spotless Track

Cleaning

Regular clearing of manure and other debris from the track keeps it clean and safe for horses to work on.

Dragging

No matter how good the footing, your track will lose its ability to absorb impact if it becomes worn. At this point your horse will derive considerably less benefit from being on the walker and may even suffer injury to his ligaments and tendons.

For your equine partner to stay safe on the exerciser, drag your track regularly. This will level out the footing again and retain the correct mixture of materials, if you’re using more than one.

Moisturizing for Maximum Impact

A certain amount of moisture in the footing will maintain its ability to absorb impact.

It also reduces the quantity of dust produced by the horses as they go round the walker, and keeps them safe from respiratory problems caused by inhalation of the particles.

A good proportion of water to footing volume is 5% – 10%.

8. Slow Introduction

How you introduce your horse to an automated walker plays a big part in how well he’ll take to this form of exercise and will affect his safety.

He should not be placed in it alone: put one or two equine pals on there first. Then allow him to watch them quietly go round before you lead him into an empty partition behind a horse he’s comfortable with.

Accustom him to the machine in walk, and take your time teaching him how to turn around when it stops.

Don’t leave him on it alone after his work session, and take him off before removing his friends.

9. Sans Halter

It is less risky if the horse doesn’t wear a halter on the free-style exerciser.

Just as it is preferable not to leave him in the paddock with one on, it’s a smart safety measure to remove his halter as he goes into his space in the walker.

Wearing a halter may make him easier to lead off the exerciser initially, but once he’s used to it, he’ll soon let you put it back on when you want to take him out again.

10. Supervision

Horses should never be left on the horse exerciser without someone keeping an eye on them. This ensures that immediate assistance can be given if an emergency should arise.

Place the walker where you can see it as you go about your daily horse business. The horses will also find their sessions more interesting if they can see activity going on around them, and they won’t feel abandoned on the walker.

Plus, you won’t forget they’re on there!

Taking these precautions will help keep your equine safe on the horse exerciser and allow you to take advantage of the many benefits this machine has to offer.

Resources & Further Information

EuroXciser

Panel Fencing

EuroXciser Partitions

Footing

Posted in: Equestrian News, Horse Exerciser

Leave a Comment (0) →

Horse Exerciser Helps in Horse Management

Horse Management: Horse Exerciser Arguably Your Barn’s Most Valued Assets

Anyone accustomed to using a horse exerciser will tell you how lost they would be if they suddenly had to do without one.

Horse exercisers are a huge asset to horse owners, trainers and breeders alike, with some barns running theirs all day. A company such as EuroXciser offers many different types to help you choose the best one for your particular situation.

Once installed, your new machine will quickly become indispensable, as you discover more and more ways to incorporate it into your daily horse management.

Limited Turnout

At facilities with restricted pasture land, especially in less rural areas, a horse walker affords animals the opportunity to get out of their stalls and stretch their legs every day.

This gentle exercise prevents them from having to stand for hours in their stalls. It provides controlled, sustained movement, increases their circulation, reduces boredom (with its associated vices) and helps maintain fitness.

Bad Weather Conditions

Many barns don’t turn the horses out when it’s raining because they churn up the grass.

An exerciser, especially a covered one, is a great solution for horses that are stall-bound during poor weather. Working in a safe environment, they can get rid of excess energy that’s usually released in the field, making them better behaved under saddle.

Another benefit of the walker is that it gives the horse owner an alternative to fitness work on slippery roads during periods of rain, sleet or snow.

When Time Is Short

Sometimes an owner simply doesn’t have time to groom and tack up the horse, warm him up, ride for an hour and cool him off, then unsaddle the animal and brush him down.

It takes much less time to put him in the exerciser where he can get a good workout without his owner feeling guilty about not spending longer with him.

Working Multiple Horses

For those with more than one horse, a great advantage of the walker is its capability to exercise several animals at once.

Machines are built to accommodate between 4 and 6 horses, and exercising them together reduces the time required by barn staff to work them.

Fitness Training & MaintenanceEuroXciser Machine

Walk work is an important part of the initial training of horses for disciplines such as endurance or eventing. The horse exerciser is extremely useful during this phase.

Later in the program it won’t replace undulating countryside or rough terrain, but instead becomes an invaluable aid in warming up the horse before his more strenuous work and cooling him off afterwards.

Adding trot laps helps maintain fitness and keep muscles toned.

Rehabilitation

Horses coming off stall rest after an injury can be safely reintroduced to work in the controlled environment of the exerciser, rather than dragging their handler while being led on foot, or bolting and bucking under saddle.

It is a gentle way to bring them back into an exercise routine without the burden of a rider.

Once you’ve chosen the right style of horse exerciser for your barn and placed in an easily accessible location, you’ll soon wonder how you ever survived without it.

Resources & Further Information

EuroXciser

Euroxciser Advantage

What you need to know about arenas and horse walkers

Posted in: Equestrian News, Horse Care, Horse Exerciser

Leave a Comment (0) →

Successful Horse Adoption

6 Tips for Successful Horse Adoption

Adopting a horse is an exciting prospect: it can lead to a special equine relationship that lasts for many years.

Here are 6 tips to help in a successful horse adoption of a rescue horse.

Reputation Is Everything

Make sure the rescue organization is trustworthy.

Talk to people who’ve adopted horses from that facility to see whether the match was a good one and check it against the points in Reputable Rescue or Shameless Scam? by Jennifer Williams, PhD.

She covers seven crucial areas to research which include: how well the horses are kept; the accessibility of information about the operation, its experience, personnel and the horses in its care; its reputation within the local law enforcement and general community, and the soundness of its adoption policies.

Keep an Open Mind

Don’t fixate on a particular breed, gender or color. Much more important are temperament, any behavioral issues and whether the horse is able to fulfill the function you require.

Make Sure You Can Afford a Horse

According to Kathryn Holcomb, a PhD candidate at the University of California, Davis, School of Veterinary Medicine, “owner financial hardship is responsible for many relinquished horses.”

You don’t want to adopt a horse only to find that you cannot afford to keep him and have to give him back. If you don’t currently own a horse, talk to the rescue organization to get a realistic assessment of what you need to budget for your new equine. The adoption fee is only the beginning!

Bring an Experienced Horse Person

Looking for a rescue is best not undertaken alone. You need a dispassionate and competent horse friend or trainer to accompany you when you check out prospective candidates.

“A trainer will look at a horse with his brain and his eyes, not his eyes and his heart,” says Jose Castro, DVM, Dipl. ACVS, ABVP, clinical instructor for equine field services with the University of Tennessee’s Large Animal Clinical Services.

He also cautions that “many of these horses have been mentally and physically abused in some way, so the adoptive owner is going to have to spend some money on training.”

Your sensible companion will make sure you don’t fall in love with an unsuitable horse.

Be Patient with Your New Horse

Your prospective new horse will likely have undergone some training while at the rescue facility, but, as indicated above, will need you to continue his education after you get him home.

If he was abused, he may have trust issues. Talk to the rescue staff about how they were overcoming them and to what you need to do to gain his confidence.

Be Prepared for Onsite Visits

Dr. Williams says that agency “guidelines may include a site visit prior to adoption and occasional visits” afterwards “to ensure that a horse and his new owner are getting along.” However, once you are confirmed as a competent horse-keeper, “such visits usually taper off and then stop.”

Adoption is a potential win-win situation for both horse and owner. By following a few simple guidelines you can find the perfect horse and form a unique bond with him that more than repays you for the chance you were willing to take on him.

Resources & Further Reading

Veterinarian Horse Adoption Tips

Adoption Stories

Demographics of Equine Donation and Adoption Article

Horse Rescue and Adoption Organizations

Adoption Guidelines

Give a Horse a Second Chance: Adopting and Caring for Rescue Horses (book)

Reputable Rescue or Shameless Scam?

Why Adopt a Free Horse?

Posted in: Dressage, Equestrian News, Horse Care

Leave a Comment (0) →

Adopting a Rescue Horse

Should You Consider Adopting a Rescue Horse?

Thousands of horses in rescue facilities are in desperate need of a loving new home, and you’d like to give one a second chance. There are many benefits to adopting a rescue horse, but how can you be sure it’s the right choice for you?

The following information can help you determine whether adoption is the best way to find your new horse.

6 Reasons to Adopt a Rescue Horse

The rescue facility wants to ensure a good fit

A reputable rescue operation will be anxious for its horses to go to the right person. The animals have been through a lot of trauma already, and the facility won’t knowingly send an equine to the wrong home.

It’s not in the best interests of the horse or the reputation of the rescue group.

The rescue facility will take the horse back

If, despite the organization’s best attempts to match you with the perfect horse, the relationship doesn’t work out, you can return the horse. In fact, adoption rules usually insist on your giving the animal back in the event you don’t want it or can’t keep it any more.

For example, the guidelines of the Heart of Phoenix Equine Rescue state: “Horses adopted through our rescue can NEVER be sold, given away, leased or otherwise removed from the home we place them in except to be returned to the rescue.”

This is a huge advantage over buying a horse from a dealer or private owner. Sellers sometimes ask for right of first refusal, but most leave you with the burden of finding the horse a new home if you and he don’t get on.

You’re given a realistic assessment of the horse

Rescue horses are handled and, where appropriate, worked for several months before they are put up for adoption. This affords the operation plenty of time to assess the type of home he should go to.

Being keen to place horses with appropriate homes, rescue management will be honest with you about the horse’s temperament, state of health and the job for which he is suited. You will be made truthfully aware of the horse’s history to the best of their knowledge.

The horse is well-cared for and up-to-date on his shots

Reputable facilities not only carry out thorough health checks of their horses, they also give them all their vaccinations, float their teeth, trim their hooves and provide a negative Coggins.

According to Jose Castro, DVM, Dipl. ACVS, ABVP, clinical instructor for equine field services with the University of Tennessee’s Large Animal Clinical Services, “reputable rescues will provide prospective owners with the adoptable horse’s medical, dental, and farrier records.”

You should also receive contact information for those who have cared for the horse in the past.

The satisfaction of giving a horse a second chance

Many of these horses have suffered terrible abuse and neglect through no fault of their own, and deserve to find a forever home where they will be appreciated and well taken care of.

If you do find the right rescue horse, you’ll feel wonderful about giving him a new lease on life and the bond you form with him will be extra special because of his background.

Some facilities let you foster before you adopt

If you find a horse that you think will suit, but are still on the fence about adopting him, most facilities need foster homes for their horses.

Offer to foster a horse and take the time to find out if he’s the one you are looking for. Some rescues, such as Angels Haven Horse Rescue, offer pre-adoption leases for this purpose.

It is a great way to try out a horse, without feeling bad if you don’t gel with him.

4 Horse Adoption Mistakes to Avoid

Don’t adopt if you’re a beginner

Rescue horses often have health and/or behavioral issues. They need an experienced horse person to handle and retrain them and a rookie rider is not the person to do this. Katherine Blocksdorf explains this in her article, Buying a Rescue Horse.

A beginner is likely to run into problems which can lead to a dangerous situation. Such horses are best left to more seasoned equestrians.

Don’t listen to your emotions

Beware of falling in love at first sight with a rescue horse or feeling sorry for him. This is the quick path to acquiring an unsuitable horse. Take a sensible horse person with you to stop you doing this!

The rescue staff will try to keep you on track, but a friend or trainer whom you trust, who knows your temperament and how well you ride, is the ideal companion to bring along to your appointment at the rescue facility.

Not checking out the rescue facility

Do your homework before approaching a rescue organization about a horse. Jose Castro, DVM, Dipl. ACVS, ABVP, says that “it’s critical that prospective owners ensure that rescues offering horses for adoption have a good reputation for making successful matches.”

Talk to people who’ve had dealings with them. Dr. Jennifer Williams says, “It’s a good sign when an adopter acquires a second horse from the organization or continues to volunteer.”

Not understanding the level of help the horse may need

Even if you’re an experienced horse person, you need to be sure that you have the skills to deal with any behavioral problems your new horse may have. He will have undergone rehabilitation at the rescue barn, but will likely need you to continue working on his issues.

Take the time to watch him being trained by the rescue staff, ask lots of questions, and be honest about your own ability to deal with the horse you’re interested in.


There are many advantages to adopting a horse. You’ll receive plenty of information and support from the rescue organization, which is keen for you to have a successful relationship with your new equine. And you can return the animal if things don’t work out.

Once you do find the right equine, the rewards will be huge - for both of you.

Resources & Further Reading

Red Bucket Rescue FAQ

Red Bucket Rescue Adoption Process

Adoption Guidelines

http://angelshavenhorserescue.com/adoption-guidelines/

http://www.thehorse.com/articles/28712/demographics-of-equine-donation-and-adoption-examined

Characteristics of relinquishing and adoptive owners of horses associated with U.S. nonprofit equine rescue organizations.

http://www.thehorse.com/articles/26560/horse-welfare-wars-when-emotion-and-fact-collide-aaep-2010

http://horses.about.com/od/buyingyourfirsthorse/a/buyingarescuehorse.htm On the dangers of rescuing a horse as your first horse ever

http://www.horses-and-horse-information.com/horserescue.shtml Good source of information about various aspects of horse rescue and adoption

http://www.wvhorserescue.org/guidelines.html Very good rescue info


Posted in: Equestrian News, Horse Care

Leave a Comment (0) →

When Other Horses Frighten Yours

When Other Horses Frighten Yours

When your horse is scared of working with other equines, communal riding areas become cause for panic and competition day becomes a nightmare.

Especially if you’re an amateur riding facing this problem, here is the method I used for overcoming my horse’s fear of oncoming equines. It also works if your animal is afraid of horses coming up from behind or getting too close for comfort.

The Plan

You will need: an enclosed riding arena and a couple of patient riding friends. When your horse is completely relaxed at his current step, move to the next one.

Step 1: with two other horses

  • Lead your horse into the middle of the arena while your two friends ride around in walk.
  • Stand there for a few minutes.
  • Once your horse is calm, lead him around on the innermost track while the other two walk in both directions on the outside tracks.
  • Continue walking while they trot and canter around him in both directions.

Step 2: with one other horse

  • Have a friend ride in walk beside you in the same direction.
  • Now walk in opposite directions.
  • Switch between the outside and inside track. Some horses (like mine) are afraid of being ‘pinned’ between the outside rail and oncoming horses.

Step 3: with one other horse

  • Trot in both directions (inside and outside tracks) while your friend stays in walk.
  • Now have her trot in both directions, too.
  • Her horse will sometimes be trotting to towards you, so use lots of shoulder-in to keep your horse focused on you. Stay calm and believe in yourself.
  • When your horse can handle this, add canter.

Step 4: with two other horses

  • Ride between the two horses, with all three traveling in the same direction at walk.
  • Walk on the inside track, with the other horses walking in the other direction towards you on the outside tracks. This gives your horse ‘escape space’ in the middle of the arena.
  • Now walk between the oncoming horses, while they give you a wide berth.
  • When your horse is comfortable with this, have him trot between the two oncoming horses while they continue walking.

Step 5: with two other horses

  • Trot between the two horses as they trot towards him and give him a wide berth.
  • Drive your horse firmly forwards if he wavers and lead him to his ‘escape area’ just past them.
  • Canter between the oncoming trotting horses.

Again, be firm in directing your horse forwards.
Finally, canter strongly forwards between the two oncoming cantering horses.
Each step may take several days or even weeks. Patience is key.

My own horse was so scared of oncoming animals in the warm-up he’d try to rear. After going through the above program he now works in the warm-up arena at competitions like a real pro!

If your horse is worried about being ridden with others, you can use the above plan to show him you are the leader on whom he can rely. Eventually he’ll realize he has nothing to be afraid of with you there to guide him.

Further Information

Your horse may benefit from calming supplements which take the edge off his nerves while allowing him to maintain focus.

I’ve found these to be very effective:

SmartPak Ultra Calm

Quiessence

Reitsport HA-100 includes joint, hoof and digestive support

For extra support on show days or at stressful events:

Total Calm & Focus comes in a paste for one-off use, or in a powder form for daily use.

Posted in: Equestrian News

Leave a Comment (0) →

Horse You Love Scares You

When the Horse You Love Scares You

Being with your horse should be fun. But if you’re frightened of him, you dread going to the barn and look for excuses not to ride.

How can you overcome this fear when your horse scares you, and get the joy back?

Mental Confidence

Get into the habit of visualizing yourself as a confident rider and horse owner.

In his excellent book, With Winning in Mind Lanny Bassham writes that it’s vital to set up a new self-image which directly conflicts with your old fearful habits and attitudes. He advocates writing a Directive Affirmation to ‘reshape the mind’ and become the person you want to be.

Putting Pen to Paper

The Directive Affirmation

Define your goal in the present tense, as if you’ve already attained it:

e.g. “I am very confident around my horse”

Fix a reasonable time limit:

e.g. three months from now

Write down the pay-back from reaching that goal:

e.g. “I ride my horse with confidence in competitions.”

Outline your plan for achieving the goal:

e.g. “I go through calming exercises before riding. I aim to go outside my comfort zone a little more each day, record every ride and read my Directive Affirmations every day.”

Put copies of your Directive Affirmation in prominent places where you’ll read it several times a day.

Bassham explains that “there are only two possible outcomes. Either you will become the person you want to be or you will stop reading the affirmation. It is that simple.”

Having used this system to get over fear of my own horse, I can attest to the truth of this.

Goal Setting

Your long-term goal is ‘to not be afraid of your horse,’ but to achieve that you need short-term goals.

Venture just a little outside your comfort zone each time you ride or handle your horse. You’ll see below that I told myself ‘to do one courageous thing a day.’ That’s not taking you way outside where your safety area, but it will stretch you a little bit daily and make you feel good about yourself.

For example, maybe you’re afraid to ride alone. Make yourself feel more comfortable by wearing a back protector, putting a neck strap on your horse and having a friend/instructor watch you. But each time you ride, have that person leave you alone, for longer and longer periods, until you’re going solo. Eventually you won’t need that vest or neck-strap.

Keep a Log of Your Rides

Record your daily progress, which Bassham calls a Success Analysis: “write down anything you did well ….. This forces you to be positive about your sport and your performance.”

In her excellent book, Inside Your Ride: Mental Skills for Being Happy and Successful with Your Horse Tonya Johnston uses the same principle in her Post-Ride Notes.

Combining features from both books, I devised the following log and filled it in before and after each of my rides while learning to overcome my own anxiety.

Post-Ride Note

(Items written in italics are those which change with every ride.)

Date: March 17th Weather: Cool and very windy

My Mood: Nervous My Horse’s Mood: Calm

Pre-ride Preparation: (i.e. your unchanging routine to help get ready to mount your horse without panicking)

Deep breathing – in the barn – on the mounting block – in walk

Positive Self-Talk:

Reading my Direct Affirmation

Telling myself I’m a good rider

Solution Oriented Attitude:

I have the skills to meet the challenge

Note: I recommend listening to an uplifting piece of music on the way to the barn, as Daniel Stewart suggests in Pressure Proof Your Riding. This will put you in the right mood while you deal with your fear, then become your victory song once you are confident!

You can sing while you groom your horse, or recite a helpful Bible verse. And of course, you’ll be visualizing a perfect ride!

Affirmations:

I can focus my horse on his work

I’m getting good at shoulder-in (my tool for when he tries to spook)

Negative Thought Stopping Cues: (permanent cues to snap you out of negative thinking)

Words: “Go forwards!”

Image: Kelly (my previous quiet horse, now deceased)

Today’s Goals:

Go quietly through four trot poles without leaping over all of them and bucking

Ride back to the barn past the line of trees swaying in the wind without worrying that he’ll spook

Goals Accomplished:

He rushed through the poles, but I stayed calm and made him walk over them

He was very ‘up’ because of the wind, but I got him to focus on shoulder-in and leg yields

Highlights: (This section must include at least two positive statements. No negatives!)

He was testing me, but I stayed firm and quiet in the saddle

He was naughty coming back to the barn and I felt as if he was going to rear. So I got off, intending to lead him back.

Then I remembered my resolution: “Do one courageous thing a day” and got back on.

He was antsy, so I drove him forwards without stiffening up J

He walked quietly back to the barn. Hurray! J

Once you concentrate on the good things instead of the bad, you’ll be amazed at the number of highlights and smiley faces your logs contain. When you get rid of the negative self-talk you allow yourself to be a competent rider.

I was able to get back on my horse that day because I’d been reading my Directive Affirmation morning, noon and night, and filling out the Post-Ride Notes for a couple of months.

Soon afterwards, I forgot to go through my mental routine - I didn’t need it anymore!

The same thing will happen to you.

Physical Confidence

Here are some practical riding tips to increase your confidence.

  1. Ride your horse purposefully forward, with transitions between gaits, changes of direction and circles to keep his brain - and yours - occupied.
  2. Ride with other quiet horses to calm you both down.
  3. Practice the following in the arena so they become a ‘comfortable default’ for both of you in real or perceived emergencies:
    • one rein stop: teach this to your horse on the ground, first, so he sees you as his leader and respects you when you use it in the saddle.
    • shoulder-in: your horse brings his head and shoulders off the track, and cannot buck, rear or bolt. But he’s still moving, so he doesn’t feel restricted and panic.

Don’t stay stuck with your fear. Using mental and physical tools you can become confident around your horse and enjoy him again.

Resources & Further Reading

Recommended Books

With Winning in Mind by Lanny Bassham

This book applies to all forms of sport and provides invaluable psychological weapons for overcoming fear.

Inside Your Ride: Mental Skills for Being Happy and Successful with Your Horse by Tonya Johnston

Pressure Proof Your Riding by Daniel Stewart

This book is a mine of useful tips for reducing stress in competitive riders, but also applies to the non-competitor.

That Winning Feeling! by Jane Savoie

Aimed at all riding levels, this book will truly boost your self-confidence.

Other Resources

5 Things Confident Riders Do

5 Things Confident Riders Avoid

Soothing Pre-Show Nerves - A Simple Way to Improve Your Performance at a Competition

Think Like a Horse He has valid points to make if you can get past the way he says some things! J

Training Your Horse to Lead and Turn Out Quietly

Teaching the One Rein Stop on the Ground

Shoulder-in & Shoulder-Fore

Clinton Anderson on Spooky Horses


Posted in: Equestrian News

Leave a Comment (0) →

Starting a Young Horse

Starting a Young Horse

Starting a young horse is an exciting prospect. You’ll notice we’re not ‘breaking’ him, because that term describes the very opposite of our goal.

The process should be enjoyable for the horse, so he is willing to do whatever his rider asks of him.

Getting Comfortable

Most horses are ready to begin their training around their third birthday

First, “your horse must see you as his ‘comfort zone,’” writes Richard Maxwell in From Birth to Backing. This book was my bible when I backed my own horse, and I cannot recommend it highly enough.

Additionally, Uwe Spenlen, a German FEI judge and international riding instructor, stresses the need to appreciate each horse’s temperament: “Only those who constantly strive to understand the nature of horses will treat them correctly.”

He warns against ‘instilling fear and resistance’ into young horses.

Join-Up

Join-up is a technique popularized by Monty Roberts and advocated by Maxwell, a student of his. The horse learns to see you as a trustworthy leader whom he wants to follow.

Join-up lays the ideal foundation for a young horse’s training and is best performed in a round pen.

Accepting the Tack

A good join-up is important before putting any equipment on your horse, so that he “knows where to go for reassurance,” according to Maxwell.

Well before it’s time to back him, accustom him to wearing a surcingle, followed by the saddle, in his stall. Add a bridle with no noseband and a brow band which doesn’t pinch his ears.

The horse’s back and teeth should be checked before putting on the saddle and bridle: “you do not want him to associate them with pain,” says Maxwell.

Once the horse is relaxed with the equipment in his stall, let him loose in the round pen. First put on the surcingle so he can get used to the feel of moving with it on, then graduate to the saddle and bridle, without the reins.

Be confident in all your movements. If you think’s this is all normal, so will he.

Lunging/Long Reining

Spenlen highly recommends lunging “for preparing to train under saddle, because it gets the young horse used to work, helps it to understand the aids and obedience and improves rhythm and looseness.”

Maxwell prefers long reining, as he feels lunging will confuse the horse after join-up.

This is a matter of preference. I wasn’t experienced with long-reins so I lunged my horse, and he was fine with it.

On the lunge the trot is the pace where “most horses find it easier to acquire certain looseness and start to let the neck drop,” according to Spenlen.

Maxwell warns against expecting perfection on day one: “once the horse understands the concept of stopping and turning that is probably enough for the day.”

Lunge sessions should not take longer than twenty minutes, with frequent changes of direction. When the horse has learned to walk, trot and canter calmly on the lunge, Spenlen adds side reins. These should not exert pressure on the horse’s mouth, side bar or poll.

They can be shortened very gradually, but only to teach the horse to “stretch towards the bit and not to shorten the neck.” They should be the same length, with the horse’s nose on or just in front of the vertical – never behind the vertical.

However, Spenlen stresses that rhythm is much more important than contact at this stage. Rhythm results from the horse being balanced, while moving naturally and loosely, and is the first phase of the Training Scale.

Backing

Approach backing with confidence and your horse will not think he has reason to worry. As Maxwell says, he is in part already backed “if he is happily carrying all the equipment he needs in order to be ridden” and listening obediently to commands from the ground.

Begin by working him as usual in an enclosed area to give him “the opportunity to move freely and achieve a certain relaxation,” Spenlen says.

You’ll need a helper to hold the horse while you mount for the first time who keeps things relaxed, and doesn’t grip the horse tightly or he’ll panic.

Attach the lunge line to the bit. A lead rein coupling attached to both bit rings will prevent the bit from sliding through the horse’s mouth if your helper needs to exert any pressure on it. A neck strap is also a good idea, for the rider to grab if necessary without upsetting the horse.

A leg-up is the best way to get on the horse’s back. Don’t immediately sit up in the saddle, but lie across it on your stomach. Talk to your horse all the while, and stroke his neck on the other side. It will be the first time he’s seen you on both sides of him at once!

Practice legging up and leaning over your horse several times, from both sides, while your handler holds him lightly.

Keep your upper body low at first, with weight not fully in the saddle, and quickly place your feet in the stirrups to help you balance evenly on the horse’s back.

Gradually raise your body. Once he accepts you sitting up, remain there for a few minutes before dismounting.

Spenlen says, “With nervous or very uptight horses it may be better to let them walk immediately to avoid building up more tension.” Then have your helper gradually bring him back to a halt for dismounting.

Maxwell warns that the horse may be more concerned by your weight coming off his back than when it went on. Have your handler keep chatting to him reassuringly as you get out of the saddle.

Repeat the process of mounting and dismounting several times.

First Ride

Initially, the handler controls the movements of the very unbalanced horse, so begin with a few steps and no contact on the reins. The rider should lean forward slightly and hold the neck strap so as not to get left behind if the horse suddenly stops or lurches forwards.

When the horse understands the handler’s requests to start and stop, the rider should then apply rein and leg aids in conjunction with those cues. The handler then becomes less involved until the rider is dictating the pace.

When it’s safe, remove the lead rein.

You are now riding your horse.

Use minimal rein contact, and steer him with an open rein. To ask for halt, use your voice while pulling gently on the reins and your neck strap.

Instead of carrying a whip, flick the end of the reins on his withers to ask him to move forward. Maxwell suggests carrying a soft rope to tickle him behind your leg as an irritant, rather than a punishment.

Trot and Canter

Ask for trot early on by employing voice and leg aids, with no rein contact. Request just a few strides at a time: your horse is still very unbalanced with you on him.

He’ll find cantering easier but a small circle is hard work for him. So choose a wide open space for the first canter. He’ll tire quickly as he’s not fit enough to keep going at this stage.

Trail Riding

I followed Maxwell’s advice to take a newly-backed horse out alone on the trails early on in his training. Seven days after starting him, I took my gelding out on his own.

Since then he has been perfectly happy to go out on the trails alone or in company.

If your horse has learned to trust you before you back him, the actual process of teaching him to carry a rider will be a natural progression of his training.

Approach backing with confidence. It will be a calm event and a stepping stone on the route to a rewarding partnership with your horse.

Resources & Further Reading

From Birth to Backing By Richard Maxwell, David and Charles (October 26, 2001)

Richard Maxwell, Horse Behaviourist

10 steps to educate young horses

Training for Young Horses

Monty Roberts

The Monty Roberts Technique: How It Works for Us

Monty Roberts Join-up with Martin Clunes’s Horse Watch this video for a light-hearted look at join-up!

The Dressage Training Scale: Prerequisites

Horsemanship How-To: Use an Opening Rein

Horse Training Fundamentals (download free report by Ken McNabb)

Behind the Vertical Explained

Posted in: Equestrian News, Horse Care

Leave a Comment (0) →

Improve Your Winter Riding

10 Ways to Improve Your Winter Riding

The onset of winter weather doesn’t have to keep you out of the saddle.

Even without an indoor arena, extra care of both your equine partner and yourself, combined with smart planning, will enable you to exercise your horse throughout the cold months to improve your winter riding.

The Horse

1 Prevent Snow Stilts

Snow quickly accumulates inside horses’ hooves, until they’re wobbling on giant snowballs. Apply non-stick cooking spray or petroleum jelly on the frogs and soles to prevent this before turn out and riding.

Katherine Blocksdorf suggests putting shoe pads on to minimize snow build-up, or removing shoes where possible.

2 Warm Bit

Warming the bit is a kindness to your horse. Place it in hot water as soon as you get to the barn, and it will be a comfortable temperature when you’re ready to put on the bridle. If hot water isn’t available, use your hands.

3 Drying Off

After riding make sure your horse is completely dry before you turn him back out with a waterproof blanket of an appropriate denier count.

4 Food & Shelter

Ensure your horse has constant access to de-iced water. Heated water buckets in the stalls and heaters in outdoor water troughs will prevent the water from freezing.

He’ll need extra feed to generate warmth as well as energy. Older horses also need additional forage, and good quality hay should be freely available.

Provide shelter from the elements so he can get out of the driving wind and snow.

The Rider

5 Appropriate Riding Attire

Dress in layers: you can shed some during exercise and put the layers back on when needed.

Riding with numb, frozen toes is miserable, and warm riding boots such as Mountain Horse Ice High Rider Wide Tall Boots provide a great solution. They cost under $100 and are insulated, extremely comfortable, durable and waterproof.

Wear the thickest gloves you can which allow you to use your fingers.

6 Drink Up

Hydration is as important for you as your horse, so remember to drink plenty of water after riding.

The Ride

7 Take Your Time

As your riding schedule becomes more haphazard, your horse’s fitness level will decrease. Reduce your expectations of him, as he won’t be able to cover the distances or keep up the pace you’re used to.

8 Check Your Route

If possible, examine the safety of the trail where you intend to ride before mounting up, especially if there’s been a snowfall and/or deep freeze since the last time you rode there.

Begin by walking your horse for longer than usual to warm up his muscles, and trot only where it’s safe. Don’t canter or gallop on slippery terrain.

9 Frozen Arena?

If you have a sand arena but are unable to ride because of ice or snow, consider adding a product called Mag Flakes which acts as a de-icer in winter.

10 Trailering

If driving conditions are safe, trailer your horse to a neighbor’s indoor arena.

Although riding in the winter can be a challenge, it’s more fun to get in the saddle whenever possible than suffer months of withdrawal symptoms!

Resources & Further Reading

Tips for Riding Safely and Comfortably in Winter

Winter Horseback Riding Tips

How to Care for Your Horse in Winter

Blanket Q & A from SmartPak

Frozen Toes Made You Close? (Read the section entitled “Frozen Toes Made You Close?”)

Posted in: Equestrian News, Horse Care

Leave a Comment (0) →

When to Clip Your Horse

Deciding When to Clip Your Horse and How

Not every horse needs clipping in winter, but under certain circumstances you may want to consider removing part, or all, of his coat.

The usual time to begin is from September to October. The hair will grow back, so you’ll need to repeat the process at three to four week intervals during the cold months. The final clip is in January.

Why Clip Your Horse?

As daylight hours decrease with the onset of fall, your horse will start to grow a thicker coat. If you plan to ride regularly during the cold months, clipping your animal reduces the amount he sweats and allows him to dry off faster after work. It also takes a lot less time to groom a clipped horse!

What Type of Clip Is Best?

The amount of coat to remove depends on your horse’s anticipated work load and his living conditions.

Note: After being clipped your horse will need blankets to keep warm, as he’ll have lost his natural protection against the elements.

A full clip is suitable for horses being exercised hard throughout the winter, and stabled with no pasture turnout. It entails removing all the horse’s hair: not only from his body, but also his head, ears and legs.

A hunter clip leaves hair on the saddle area to keep it protected, and on the legs for warmth. In some cases the lower half of the head is left untouched. This clip suits horses in medium to hard work.

The blanket clip is another good choice for horses in regular winter work. The hair from the head, neck, under belly and part of the rump is removed, leaving the legs warm and protected. The large area of coat left on the body resembles the shape of a blanket.

A trace clip suits a horse in light to medium work if he is turned out during daylight hours. The hair is removed from the lower half of the neck, chest, stomach and upper part of the hind legs where the horse sweats most. The low trace clip leaves more hair on than the high trace clip, where the lower half of the head hair is removed, and more is taken off the neck, barrel and hind end.

The Irish clip removes only the hair round the head, neck and chest area which makes it perfect for horses in light work and turned out in the daytime.

Its cousin, the bib clip, takes the coat off just the front of the neck and chest areas. This is useful if your horse is turned out year round.

The horse clipping website created by Lister Shearing Equipment suggests giving a bib clip to a horse that hasn’t previously been clipped as a good introduction to the process.

The clipping styles you choose will depend on how hard your horse will work and what his turn-out situation is.

If your riding will be intermittent during the cold months, he is best left with a full winter coat. Plan extra time after exercise to dry him off before he is turned out again – with a blanket, if appropriate.

Resources & Further Reading

Horse Clipping Tips

Types of Horse Clip

Clipping Horses

Clipping Your Horse

How to Clip a Horse

About Body Clipping

How to Clip a Horse for the First Time (video)

Clipping Challenges (video)

The Big Chill

Horse and Pony Care in Autumn and Winter

Lister Shearing Equipment


Posted in: Equestrian News, Horse Care

Leave a Comment (0) →

Stallion Social Deprivation

Does Your Stallion Have to Live in Solitary Confinement?

A stallion’s life is a lonely one when he’s turned out by himself and stabled where he’s unable to socialize with other horses.

Like mares and geldings, stallions thrive on interaction with other equines, and social deprivation is a sad existence for them. It also creates more work for their owners.

An Alternative Life-Style

In 2009 and 2010 a study subtitled A Possibility to Keep Stallions in Group was conducted to investigate “the possibility of housing breeding stallions … in groups on a large pasture.”

The stallions in the experiment were Freiberger horses owned by the Swiss National Stud and aged between 8 and 19. They were driving horses, but also used for breeding, and had lived at the stud for 5 to 16 years.

A group of 5 stallions was observed in 2009. Of these, 4 were in the group of 8 for the 2010 study.

The Researchers: concluded that, under certain conditions, “breeding stallions could be housed together on a large pasture … (which could) potentially increase horse welfare and reduce labour associated with horse management.”

Background Check

In the wild, stallions without a harem form ‘bachelor bands.’ These consist of up to 15 yearlings or young stallions, plus “older stallions that have lost their harem.”

The study notes that threatening behavior among the members of these bands is natural, as are avoidance and submission. But, “when they interact, stallions typically display the minimum amount of aggression required by the situation.” (My italics.)

These ‘ritualized displays’ become less intense and of shorter duration over time, and “seem to facilitate stallions being able to graze side-by-side.” The good news is that the displays alone help establish and maintain the group’s hierarchy “without involving physical aggression.”

A Stallion Needs Love, Too

Depriving horses of physical contact with each other is bad for their mental health. They are likely to “display more stress-related behaviours than horses stabled in pairs” and develop stereotypies such as weaving and cribbing. “Social interactions should therefore be considered as crucial for (a stallion’s) welfare.”

The earlier a stallion is socialized the better, since “horses that have been living in a group have more refined social skills and are less aggressive towards other horses and even towards humans during training.”

Trainer Jim Brinkman, manager of the Pitzer Ranch in Ericson, Nebraska, says in Owning a manageable stallion “we’ll let (the stallions) run together until they are 3 or 4 and bring the stallions in to determine if they should be cut. It’s good for them to run with a group so they learn how to get along with each other.”

Owners who haven’t done this are understandably loath to turn out their stallions in groups because of the high risk of injury, particularly during the initial introductory phase. But the study suggests that under specific conditions these stallions can also be kept in groups.

The potential for physical aggression significantly decreases and is “kept at a minimum after only three or four days following integration.”

Precautionary Measures

Before being put together, the Swiss stallions spent two weeks stabled next to each other, as “prior exposure can reduce aggression.” These horses were able to see, hear, smell and partially touch their equine comrades through the stable partitions. Except for one stud, they had been hitched next to each other in driving pairs.

In 2009, the 4 stallions were individually turned out for two hours a day. The 2010 group of 8 was exercised on the horse exerciser, half of them at a time.

After two weeks their shoes were removed, to reduce the risk of injury when turned out together.

Close Encounters of the Studly Kind

Each stallion was led on a halter once round the 10 acre field. Then all of them were released together, while 10 handlers stood by with whips should serious fighting break out and intervention become necessary.

The pasture was out of sight of mares and other horses: the stallions remained outdoors for six months.

There were no enclosed spaces, and they had access to six wooden field shelters with wide entrances and straw on the ground. Food distribution was conducted in such a way as to allow each animal to eat without fear of threats or kicks from the others.

Friends or Foes?

It was observed that “when two males encounter each other, they perform a ritual that allows them to assess each other’s fighting abilities … without having to fight.” The stallions indulged in more show than actual aggression.

Those stallions which had previously been turned out with others “had less agonistic, ritual and affiliative interactions than the other stallions.”

Agonistic relates to aggressive or defensive behavior, such as fighting, fleeing or submission.

Table 1. lists 14 different types of agonistic behavior observed among the stallions, including chasing, pushing, kneeling and fleeing or following.

Affiliative interactions were exhibited by such behaviors as nipping at each other in play without pinning their ears back and mutual grooming. They increased early in the stallions’ time together.

Affiliative behavior releases social tension between horses in a group. After 9 days it lessened among the stallions in the study, possibly because they had now formed their social bonds and no longer needed to indulge in it so frequently to maintain them.

Pulling Rank

Interestingly, the lower ranking stallions tended to “engage in more rituals than high-ranking ones.” They appeared to have a “tendency for compromising rather than fighting.”

The higher ranking stallions initiate affiliative behavior - not the lower-ranking ones, as this may lead to aggression from the high ranking stud.

Jim Brinkman’s approach is: “If particular stallions can’t seem to get along, they will stay together longer and work it out or be put with the geldings.” His solution does not include isolating the horse.

Equine behaviorist Sue McDonnell, Ph.D., from the University of Pennsylvania School of Veterinary Medicine explains in Owning a manageable stallion how important it is for stallions to have “plenty of space.” She stresses that “the least risk for injury comes with huge open spaces.” If there is a fight, usually the weaker horse will back down, and there needs to be “enough room for a horse to get away.”

Your stallion doesn’t have to live in solitary confinement. Under the proper conditions, he can be successfully integrated into a herd where he will be much happier. His stress levels will lower and he’ll know how to behave around other horses. In addition, he’ll be easier for you to handle and less work to take care of.

Resources & Further Reading

Pattern of Social Interactions after Group Integration: A Possibility to Keep Stallions in Group

Table 1 of the study, showing agonistic and affiliative behaviors

Researchers:

Sabrina Briefer Freymond, Elodie F. Briefer, Rudolf Von Niederhäusern and Iris Bachmann

Swiss National Stud: (Website available only in German and French)

Das Schweizerische Nationalgestüt SNG

Freiberger Horses

Owning a manageable stallion

Sue McDonnell, Ms, PhD

Stallions with Geldings?

Huddling in Horses


Posted in: Equestrian News, Horse Care

Leave a Comment (0) →

Horse Behavioral Disorders

Is Your Horse Happy in His Job?

A common cause of abnormal horse behavioral disorders is poor living conditions. But interesting results were yielded by a study to determine whether specific behaviors relate directly to the horse’s type of work.

The Horses Used

Being studied were 76 French Saddlebred geldings at the Ecole Nationale d’Equitation in Saumur, varying in age from 5 to 16. Their living conditions were identical: no turnout or equine socialization, and one hour of work daily.

Behavioral disorders were observed in 65 of the horses. Researchers of the study state: ‘This very high rate did reflect unsuitable environmental conditions.’

The animals performed one of six different types of work and two main categories of behavior emerged, which clearly resulted from their jobs. The vaulting (voltige) horses were classed separately.

(Note: Information about the behavioral disorders observed and the horses’ work types is shown under Resources.)

Dressage & High School Horses (Category 1)

These horses had a higher tendency to exhibit 2 or more behavioral disorders, called stereotypies.

Over 88% of the dressage horses and 81% of the high school horses developed stereotypies, and were the only horses to crib and/or windsuck.

Two horses in this group were seen weaving, but many more were head tossing or nodding than in Category 2 (below).

Of all the disciplines, the dressage horses exhibited their abnormal behaviors for the longest periods of time.

The researchers suggest that one reason why headshaking and nodding were more prevalent among the dressage horses is because they are required to keep their necks flexed for most of their time under saddle, and work in ‘restrained gaits.’

Eventers, Jumpers and Advanced Riding School (Category 2)

Most common stereotypy in this group was repetitive licking and/or biting in the stalls of such structures as the walls, grids and feeders.

This was observed in 90% of the eventers, 87% of the jumpers and 71% of the advanced riding school horses.

They exhibited different stereotypies from the dressage horses possibly because they were encouraged to move ‘forward in a less ritualized posture.’

Their biting and licking might be negative reactions to the ‘unsuitable conditions (social separation..) they were housed in,’ or they were searching ‘for elements missing in their diet.’

Voltige (Vaulting) Horses

These horses ‘clearly showed more minor stereotypies than the other categories.’ Tongue play was exhibited by 4 horses in the small group of 7.

Constantly wearing side reins to keep ‘their necks bent and their heads down’ may have resulted in their tongues hanging out as ‘a resistance to their bits and ….. pressure on their mandibles.’

The vaulting horses spent ‘spent more time lying down in the box than the other categories.’ It was noted that their jobs required calmer natures. This attribute, combined with a limited amount of ‘interpersonal conflicts’ with humans, may have made them ‘more resistant to possible work stressors.’

The study concludes that ‘work may be a source of chronic abnormal behavior’ in horses. It is naturally exacerbated by restrictive living conditions. However, this research shows that the stressors of individual disciplines have a powerful impact on the kind of stereotypy horses are likely to develop.

Varying the work schedule, and allowing them to ‘be horses’ by giving them adequate turnout with equine companions, will reduce the likelihood of unhappy, abnormal behavior.

Resources

Could Work Be a Source of Behavioural Disorders? A Study in Horses

Researchers

Martine Hausberger, Emmanuel Gautier, Véronique Biquand, Christophe Lunel, Patrick Jégo

For information about how the research was conducted see:

Materials & Methods: 1) Animals and observation procedures.

For explanation of individual abnormal behaviours, see the following definitions from:

Materials & Methods: 2) Terminology and behaviour observed.

Weaving: obvious lateral swaying, movement of head, neck, forequarters and sometimes hindquarters.

“Cribbing and windsucking: when cribbing, the horse grasps a fixed object with its incisors, pulls backwards and draws air into its oesophagus. Windsucking is similar but no object is grasped.

“Head shaking and nodding: repetitive bobbing of head up and down or recurrent and sudden bouts of head tossing.

“Tongue play: the horse sticks out its tongue and twists it in the air.

“In addition to the “more classical” stereotypies we recorded repetitive licking/biting (walls, grids, feeder…) movements as additional abnormal repetitive behaviours.

For a definition of horses’ work used in the research, see:

Supporting Information - Appendix S1: Type of Work

Posted in: Dressage, Equestrian News, Horse Care

Leave a Comment (0) →

Horse Blanket for Winter

Does Your Horse Need a Horse Blanket This Winter?

Some owners blanket their equines at the first drop in temperature, while others believe they don’t need any extra help to stay warm because they have winter coats. There are good arguments for and against using a horse blanket. So how will you know whether or not your horse needs additional protection this winter?

The Pro-Blanket Arguments

Under certain circumstances blanketing is advisable.

The Clipped Horse

Clipping your horse in winter makes him easier to keep clean and he dries off faster after work.

However, having lost most - or all - of his winter coat, he’ll need a blanket. The amount of warmth it should offer will be determined by how much hair has been removed.

The Older Horse

A horse that is getting on in years has a harder time keeping warm during cold weather than his younger companions. His metabolism is slower, so his body has to work more to generate enough heat.

Increasing his feed will help, together with ad lib forage. But when the temperatures start to drop it’s time to consider putting a blanket on him.

When the Weather Gets Cold

When the thermometer dips below freezing, your horse may need extra protection.

Katherine Blocksdorf writes, “Horses can be left un-blanketed in very still, cold weather-4F (-20C), and they may be fine.” But very windy conditions blow away the body heat trapped in the horse’s hair.

He should have shelter at all times with access to forage to help him stay warm. Water (unfrozen!) is another must: dehydration is big danger in cold weather.

You will be able to tell from his behavior if he’s uncomfortable.

Freezing Rain

When freezing or below freezing temperatures combine with rain or sleet, (and the wind) your horse will start to feel miserable without extra help. The constant pounding on his coat makes it unable to stand up and trap the hot air from his body to keep him warm, a process known as pilorection.

It’s now time to bring him indoors and dry him off by thatching. “Use dry, shaken-out hay under a rug, and always towel dry the ears and legs,” says Polly Williamson, eventer.

Once he is warm and dry, you can turn the back out with a heavy duty turnout blanket until the bad weather passes.

The Anti-Blanket Arguments

Negative Effects of Regular Blanket Use

In the same way that constant driving rain and sleet flatten a horse’s coat, so does a blanket. If he wears one constantly, his coat hairs lose their ability to spring up and trap air.

The horse then has to wear a blanket all the time in order to stay warm, which isn’t good for him. If an unclipped horse wears one only in extreme weather conditions, his coat will protect him adequately the rest of the time.

How to Avoid the Negative Effects of Regular Blanket use

An Australian company, Macs Equine has developed a blanket to circumvent this issue. It’s called a ‘cool heat horse rug.’ Strips on the underside raise the blanket off the horse’s back and allow the hairs to stand up normally.

The company ships worldwide, and blankets arrive within 8 – 12 business days. This makes the cool heat horse rug worth considering if you want to blanket regularly without inhibiting pilorection.

The Unclipped Horse

If a horse with a full coat can get out of the wind and driving rain or snow, he is unlikely to need a blanket. Possible exceptions to this are if he is very old or sick.

Even if he is in work, as long as you dry him off properly before turning him back out, he should be fine without a blanket. He’ll soon let you know if he disagrees!

Access to forage 24/7 is important to keep that inner oven working, and being able to move around helps generate heat, too.

But remember, when the temperature dips below freezing he may need a blanket.

Ill-Fitting Blankets & Other Crimes

  • A horse in a badly fitting blanket is in worse shape than when not wearing one at all. It will cause soreness where it chafes, and loose fitting straps create a dangerous trap for legs to get caught in. It is extremely important to make sure the blanket fits that particular horse. This excellent video illustrates how to fit a blanket properly.
  • Another common problem is horses being expected to live for months on end during the winter without ever having their blankets removed. Imagine wearing very snug (and possibly too tight) pajamas for the whole of winter, regardless of the temperature in the house, and never being able to take them off to have a bath or shower! Wouldn’t that be really uncomfortable?
  • Blankets should be removed regularly to give the horse’s coat a chance to breathe. Brush him often to maintain his sense of well-being and not being neglected. Grooming also provides an opportunity to check that his shoulders and the inside of his hind legs aren’t getting rubbed. Be ready to switch to a lighter blanket if the temperature calls for it. Keep aware of day to day variations in the outside conditions – there’s no ‘one blanket for all weathers.’
  • Save the heavy duty one for really cold spells, otherwise your horse will sweat uncomfortably. According to Intelligent Horsecare, “Overheating doesn’t only cause unnecessary discomfort but reduces movement and can cause skin complaints.” Anhidrosis is another negative result from incorrect blanketing.
  • Don’t get lazy and add turnout blankets on top of stable blankets when the horse goes out. (Yes, people actually do this!)

The decision to blanket is based on many factors, and no one answer fits all horses. Common sense is key here. As Ms. Blocksdorf says: “Let your horse’s behavior and physical condition be your guide.”

Each winter let him tell you whether he needs a blanket or would prefer to be left au naturel. Monitor him daily throughout the cold season and be ready to add extra protection if necessary.

Resources & Further Reading

Should You Blanket Your Horse?

The Right Blanket for Any Temperature

How to Fit a Horse Blanket

Blankets for Horses: FAQs

How to Put on a Winter Blanket (video)

Thatching

Top Tips to Survive the Winter

To Blanket Your Horse or Not to Blanket … That Is The Question

At what temperature should I blanket my horse?

Why Not All Equines Need a Winter Horse Blanket

Brand or cut of Blanket for Arabian?

New Improved Revolutionary Cool Heat Horse Rugs

Cool Heat Rugs

Posted in: Equestrian News, Horse Care

Leave a Comment (0) →

Endurance Riding

Endurance Riding: A Growing Sport

Endurance riding doesn’t require an expensive horse with fabulous gaits or jumping ability: people with ‘ordinary’ equines can participate.

But success in this sport does rely heavily on fitness training. This demands a lot of time working with your horse and forms part of the appeal for many riders.

What Is Involved?

Endurance trails cover varied and sometimes challenging terrain. Depending on the level of difficulty, they can include rugged land, and long climbs with correspondingly steep downhill slopes.

There are three categories of endurance competition, including one for those starting out.

Full Distance

At least 50 miles are ridden in one day, with a maximum allowed distance of 150 miles to be completed in three days.

Limited Distance Rides

These are between 25 and 35 miles long. Allowed times are 6 hours for 25 miles and 8 ½ hours for 35 miles.

Introductory Rides

Less than 22.4 miles, and held in conjunction with official endurance rides hosted by the American Endurance Ride Conference (AERC ). These rides don’t count towards points or miles with the AERC.

The maximum allowed time for completing any of the above distances includes en route and post-ride vet exams. Within 30 minutes of stopping, the horse’s heart beats per minutes must be down to around 60 bpm.

What Kind of Horse Do I Need?

Rule No. 3 of the AERC Rules & Regulations states that “any breed or type of equine” must be allowed to participate.

Breed & Conformation

The AERC Endurance Riders Handbook, American Endurance Riders Conference (Chapter Three) gives a helpful overview of suitable endurance horse types. Certain breeds naturally have speed and stamina, especially the Arab and many Arab crosses, including the Araloosa (Arab/Appaloosa cross). Pure-bred Appaloosas rate highly, too, as do Standardbreds.

Regardless of breed, good confirmation is essential: the grueling conditions will exacerbate any weaknesses in the horse’s build.

Strong hooves are another must, to withstand the demanding terrain.

Age

“Equines entered in the full distances must be at least 60 months old at the time of the ride” (Rule 3.1) and in Limited Distance Rides they must be at least four years old (Rule L2.1).

The animal’s actual date of birth is used to determine eligibility. If the horse has no papers, the control judge uses discretion in assessing age.

Who Can Take Part in Endurance Riding?

There are two riding divisions: Senior and Junior.

Seniors have four weight divisions (Rule 8.5.2): Heavyweight, Middleweight, Lightweight and Featherweight.

Under Rule 10.1, “A Junior is a rider who was under the age of 16 as of the first day of the ride season in which the ride is held” and must be accompanied by a “competent adult (21 years or older) sponsor throughout the competition.”

This fun and fast-growing sport develops stamina and staying power in both horse and human. The months and years of training together create a close bond between them, and every partnership to successfully cross the finish line of an endurance race is a winner.

Resources & Further Reading

American Endurance Ride Conference

AERC Rules and Regulations

South Eastern Distance Riders Association FAQ

Arabian Horse Association FAQ about Endurance Riding

Endurance Primer

Endurance.net

What Is Endurance Riding?

Endurance (USEF)

Endurance Horseback Riding.com

‘Classic’Events and Ride Calendars

Tevis Cup (USA)

Quilty (Australia)

UK Events

USA Events


Posted in: Equestrian News

Leave a Comment (0) →

Endurance Horse

Fit to Finish: Training the Endurance Horse

Endurance is “the capacity of something to last or to withstand wear and tear” which explains why appropriate fitness is crucial in the endurance horse.

The much-coveted Best Condition award is another incentive for adequate preapration. The AERC Rules and Regulations state: “all of the first ten completing equines are eligible for consideration.”

Ideally your horse should be fit enough to complete the course and still be in great shape when he crosses the finish line.

How Long Before the Endurance Horse Is Fit?

Training for a 50 mile endurance horse ride can require twelve months or longer. Getting ready to compete in a 100 plus mile endurance horse ride or FEI (international) event takes several years. Many endurance events host 25, 50 and 100 mile distance race opportunities on race day to choose from.

Francois & Laura Seegers explain that not all parts of the horse’s anatomy become conditioned at the same rate.

The heart and lungs need 3 months, muscles take between 3 and 6 months, tendons and ligaments require 6 to 12 months, and the hooves are used to their new work after 7 months. Bone needs between 1 to 3 years to become fully acclimatized!

Knowing this encourages endurance riders to follow a slow and steady program.

Learn to Take Your Horse’s Pulse

You need to determine your horse’s recovery rate after exercise. In order to pass vet checks his heart beats per minute (bpm) will need to be within designated parameters 30 minutes after the end of exercise. This is usually around 60 – 64 bpm.

The Southeast Endurance Riders Association states that “How quickly the pulse drops after exercise is the single best indicator of fitness, and this is why endurance riders and endurance rides put such high priority on keeping track of it.”

They suggest obtaining and learning how to use a stethoscope: “To take a horse’s pulse, put the stethoscope behind and slightly above the left elbow.”

Track Your Distances

One easy way to measure the miles covered during training is to download the free app created by WoofWear especially for endurance horse riders.

Called Track My Hack this valuable tool records distance traveled and the speed and time taken. You can store this information separately for individual horses.

The Training Program

Those with access to a Horse Exerciser have a distinct advantage during endurance fitness training, as they can incorporate this time saving device into their horses’ routine throughout the program.

Weeks 1 – 6

Perseverance Stud begins their conditioning program with six weeks of walking for shod horses. They double all training durations for barefoot horses.

The goal is “To prepare the horse physically and psychologically for more intensive exercise.”

  • For 4 to 5 days a week the horse is walked at an active pace on the most varied terrain you can find, building up to 2 – 3 hours each session by the end of this period. The Australian Endurance Riders Association Inc. (AERA) suggest a goal of 5-6 mph walking on flat terrain during the first weeks.
  • If the horse is already in work before his endurance training begins, one day a week should be spent trotting the horse on the lunge or on a horse exerciser designed to accommodate that gait.
  • A once a week schooling day, which can include trot and canter, should also be incorporated into the program at this stage.
  • Towards the end of the 6 weeks, the walk sessions can include short trotting distances. The rider should be cultivating calm confidence in the horse, building to 20 minutes of total trot during the walk sessions.
  • The horse also needs to be worked on hills to build muscle. Once his condition allows, trot up hills but not downhill, as this puts considerable strain on the forelegs.

Weeks 7 to 12

This phase builds up the horse’s stamina as he learns to trot long distances at a constant pace, in an established rhythm. He also develops the energy-saving trot he will need for competition.

The Steegers recommend 3 to 4 workouts a week, defining workouts as ‘hard work’ in which the horse exerts greater effort than normal. His pulse will be higher than usual 20 minutes after this type of work, indicating that he has been stressed.

  • Begin with 15 to 20 minutes of walk to warm up, followed by alternating walk and trot.The horse should trot with his neck extended, his head low and his back rounded. This makes it easier for him to carry the rider, as well as creating increasing length and power in his strides.
  • The AERA gives a goal for the end of week 8 of a 9 – 10 mph average speed when riding 50% walk to 50% trot.They also suggest entering the horse into an Introductory Ride at this point, with the aim of completing it at 10 mph. Test the horse’s fitness two weeks before by completing a 20 mile trial run to ensure he copes well with it.
  • By week 12 the horse should be doing 2 hours of active, unbroken trot.
  • Include two recovery days per week.Perseverance Stud uses these days to “allow the horse to recover from the stress. Exercises you can do are twenty minute lunge sessions (ring work) at a steady trot, schooling, a gentle hack or outride, etc.”
  • Last, but far from least, comes one rest day a week.If the horse seems out of sorts, he’ll need more than 24 hours of rest. Horses become conditioned at different rates, and yours may need a little longer than the average.

Weeks 13 -14

This phase gets the heart and lungs fit, and the horse now learns to canter rhythmically at a constant speed – while having fun!

  • Over the next 14 days incorporate five canter sessions.Always begin work with walk warm-up before alternating trot and canter over short distances.Switching between these gaits will “clear lactic acid from the muscles” according to the Steegers. An excess of lactic acid causes the muscles to contract or ‘tie up,’ and in extreme cases the horse is unable to move.
  • Build up the length of these rides to 1 hour of alternate trot and canter, and increase to a total of 2 hours.Now is the time for your horse to learn to canter in a controlled manner with other horses. He must be able to maintain a relaxed, constant and non-competitive speed regardless of the equines around him.
  • Since his work is more demanding now, allow your horse 2 -4 recovery days and up to 3 rest days per week, paying close attention to his overall demeanor. A lack of energy or being ‘off’ will require more rest time.

Week 15

You are now one week away from your first endurance horse ride, so use this time to build energy reserves. The horse gets light work this week, and will need less concentrated feed.

He should then be ready for his first 25 mile race. The pace should be relaxed, taking 5 to 6 hours to complete the 40 km, depending on the terrain.

Crossing the finish line for the first time will give you a tremendous sense of achievement and make you keen to tackle your next endurance race.

Resources & Further Reading

Endurance Riding Requires Courage and Perseverance of Horse and Rider

Plan Your Program

Endurance Primer

Tips and Hints for Endurance Riding

Conditioning

Welcome to Endurance (FEI)

Frequently Asked Questions (includes information about Competitive Trail Rides)

Endurance Riding Requires Courage and Perseverance of Horse and Rider

Endurance Basics: Training your horse to deal with a vet check

Plan Your Program

Tips and Hints for Endurance Riding

A Simple Method of Conditioning the Endurance Horse

The Ten Commandments of Endurance

Feeding and Training the Horse for its First Endurance Ride

For UK riders (and even from other countries!) here’s an introductory video

(And if you’re wondering what an OS map is, it stands for “Ordinance Survey” J )

AERC Endurance Riders Handbook, American Endurance Riders Conference (2003)

This handbook can be viewed online.

America’s Long Distance Challenge, Karen Paulo (1990)

Go the Distance, Nancy Loving (2006)

The Complete Guide to Endurance Riding and Competition, Donna Snyder Smith

Posted in: Equestrian News, Horse Exerciser

Leave a Comment (0) →

Event Horse Fit

Getting the Event Horse Fit to Compete

Event horses are all-round athletes. They must be skilled in the three separate disciplines of dressage, stadium jumping and jumping cross-country, and have the stamina to perform in all three phases within a short space of time. In addition, they require endurance for galloping up and down hills while negotiating rustic obstacles.

Appropriate fitness training is therefore essential for the eventer to perform comfortably and be a real contender in competition.

Initial Planning

World Champion Blyth Tait, event rider and Olympic gold medalist, writes in Eventing Insights that it’s a good idea, when drawing up your horse’s training schedule, to work backwards from the day he needs to be fully fit.

For the animal which has been off for a while, he suggests allowing seventeen to eighteen weeks for bringing him back. He aims to achieve peak fitness in his mount one week before a big event.

This time frame gives enough leeway for any unforeseen setbacks or, if the horse gets fit early, to maintain that level of readiness.

First Phase – Weeks One through Five

He believes in steady roadwork and riding on the trails in walk to start with. In the online edition of Horse & Hound, Josephine Carr writes that the professionals usually build up from half an hour on the first day to one hour on day seven, working towards two hours at the end of the second week.

Then he adds trotting on tarmac (where safe) as this “can help to assist in the hardening of the hooves and strengthening of the bones.” He is careful to maintain a slow pace to reduce jarring on the legs.

He also introduces some “simple flatwork sessions a few days a week.” This gets the horse listening to his rider, develops muscle tone and makes him suppler before the work becomes more arduous.

Now is when he begins giving the horse hard feed, if he was previously out at pasture.

Second Phase – Weeks Six Onwards

Canter Work

It is now time to introduce more canter work, including interval-training.

In his book, Cross-Country Masterclass, Olympic Champion Leslie Law says that he starts this fast work gently in a ‘strong working canter’ over four to five furlongs uphill twice a week. “It does help to work some horses together, as they seem to draw inspiration and encouragement from company.” However, he doesn’t advocate this with strong, excitable horses!

He lets the horse walk downhill again between bouts of galloping, building up to a combination of walk and trot downhill when the horse is fitter. By maintaining the horse’s heart and respiration rate before he gallops again, exertion is gradually increased which “builds up lung and heart capacity.”

Interval training begins with alternating short periods of stress with recovery times. He gradually increases the periods of fast work but allows the same recovery time.

Tait plans these canter sessions every fourth day, with the intention of minimizing potential injury or giving minor stress issues time to repair before the next time. He begins by alternating three five-minute sessions of steady canter with three minutes’ walk recovery time. The length of canter time is gradually increased, but the recovery phase remains at three minutes in walk. A large flat field is used for this work.

His three-star event horses maximize their canter spurts at nine minutes. That time will be less for those riding in the lower levels. Horse & Hound suggests a once a week session of two five minute canters with three minutes’ walk recovery for novice one day eventers. These horses need fewer weeks to reach the necessary level of fitness than upper level equine athletes, and will usually be ready within three months.

Other Work

Between the interval training days, the horse’s flatwork continues, becoming more intensive, and jumping over fences begins. British show jumper William Funnell “starts with some cross-poles built into the flatwork” and includes bounces to “build and maintain the jumping muscles.” He doesn’t believe that high jumps are necessary to get the horse fit.

Training also includes trail riding (or ‘hacking,’ as it is called in the U.K.) which both conditions the horse and relaxes him. Exercising on off days on a horse exerciser also helps conditioning at a low stress pace.

When Is Your Horse Fit?

As the horse becomes fitter and his heart becomes stronger, his heart rate decreases.

You can buy a heart monitor to record the improvement of his recovery rate between canter sessions. Dual Olympic Gold Medallist Jill Ralton explains how to use this to determine fitness. “Careful monitoring of heart rates will help you to assess the horse’s fitness by giving you an indication of just how hard he is working and how quickly he is recovering from that work.”

She explains that the heart rate should be between 130 and 150 beats per minute (bpm) after canter work, and the horse should “recover to 80 bpm before setting off again. This recovery should take around 3 mins.”

Your horse’s heart rate should be below 100 bpm after that time. If not, he is being pushed too hard and the horse should not canter again until it reaches approximately 80 bpm. If his bpm are less than 60 after the three minutes’ walk you need to toughen up your program!

Blyth Tait takes a more relaxed approach: “I do not worry about being overly-technical in analyzing heart-beats.” He prefers to note whether the horse’s breathing is “excessively heavy or if he is taking a prolonged time to recover.” This takes into account what is normal for each horse and he “notices improving recovery rates.”

Event horses have arguably the most arduous yet varied lifestyle of all the English riding disciplines. They must train to a high level of fitness to meet the demands of the three phases of a one or three day event.

This involves developing strength and suppleness for dressage, and combining it with stamina for the stadium and cross-country phases. A horse coming in from a long period of down time at pasture will require between three to four and a half months of training to bring him back to peak fitness.

Resources and Further Reading


Blyth Tait – The Horseman’s Horseman

Eventing Insights: Blyth Tait World Champion

Getting Your Horse Fit Like the Professionals

All About Interval Training

Cross-Country Master Class with Leslie Law

Eventing Explained

How to Exercise Your Horse for Strength and Flexibility

Interval Training for Conditioning Horses

Fit for Eventing

Interval Training for Explosive Horse Power

Everyday Conditioning: Fitness for the Lower Level Horse

Posted in: Equestrian News

Leave a Comment (0) →

Developing Dressage Horse Strength

Dressage Horse Strength

Dressage is beautiful to watch when the horse appears to move effortlessly with imperceptible aids from his rider.

Cultivating this harmonious partnership takes years of patient training, during which time the horse’s muscles become much stronger. This makes it easier for him to carry his rider and perform smoothly.

Straight Talk

In accordance with the Training Scale, the horse is first encouraged to relax under saddle and find his natural rhythm. This allows him to move with regularity in his steps and prepares him for the work which will strengthen certain muscles.

Hilary Clayton writes in Components of Collection that in the early phases of his dressage education the emphasis is on “teaching the horse to move forward in rhythm and increasing the driving power of the hind limbs.”

But if the animal isn’t moving straight, this propulsive power is not being used efficiently.

Think of pushing a shopping cart with a wheel that turns outwards. A lot of energy is wasted combatting that sideways motion to move the cart forwards. On the other hand, pushing a cart with properly aligned wheels requires little effort.

It’s the same with horses. They are naturally crooked and need training to move straight with economy of effort.

In his book The Elements of Dressage: A Guide for Training the Young Horse Kurd Albrecht von Ziegnerexplains that straightness involves getting your horse to release the muscles on his ‘soft’ side.

As an example, a horse’s ‘soft’ side is on his right, if he bends more easily that way than to the left. The right muscles are more contracted than those on his left, and these must become relaxed to allow the horse to straighten out.

Herr von Ziegner suggests the following exercises to straighten the horse:

When the horse starts to move straight, the rider can feel a sudden surge of extra energy being released from the animal’s hindquarters. The previously wasted energy is now being used to propel him forwards.

Striking the Right Balance

Through traveling straight and using both hind legs equally for propulsion, the horse becomes balanced. Cynthia Hodges, M.A. explains: “As a result, the horse’s soundness is preserved and the gaits are more beautiful.”

The haunches are now being asked to bend more and need strengthening. These exercises help develop the muscles in the horse’s hind end:

  • Half-halts, which shift the horse’s weight back onto the hind legs and “increase the engagement of the hindquarters” says von Ziegner.
  • Transitions, i.e. the changes up and down between the gaits. Bonnie Walker in Five Ways to Engage Your Horse’s Hind Leg advocates them as “a gentle, low impact way to encourage your horse to rebalance himself and activate the hind.”

Von Ziegner suggests the following exercises to activate the hind feet and supple the horse:

As the horse’s center of balance shifts onto his hindquarters, weight is distributed evenly onto all four feet. This elevates his forehand and prepares the horse for collection.

Dressage horse strength is increased by correctly applying the fundamentals of rhythmic forward riding, straightness and balance, while developing trust and harmony within the partnership.

Resources and Further Reading

Components of Collection

What are the Aids to Train My Dressage Horse to Leg Yield?

Straighten Your Horse with the Dressage Movements Shoulder-in, Shoulder-fore, and First Position

Achieving Balance

How to Do a Half-Halt

Transitions, the Secret to Balanced Riding

Five Ways to Engage Your Horse’s Hind Leg

Lateral Work: Progressing to Shoulder-In

Introducing the Counter-Canter

The Training Pyramid - Collection

On the Forehand

Increased Weight on the Forelegs

Building a Stronger Dressage Horse

The Horse’s Head and Neck in Relation to Balance

Dressage Today – Cross Training

Posted in: Dressage, Equestrian News

Leave a Comment (0) →

Buying an Off Track Thoroughbred

OTTB stands for “Off Track Thoroughbred,” and thousands of these retired racehorses are looking for new owners to retrain them and give them a loving home, where they can excel at their next job.

The Amazingly Versatile Thoroughbred

The Retired Racehorse Training Project conducted a study on the second careers of 4,200 OTTBs in 47 US states and Canada. Here is the breakdown of the disciplines they switched to:
37% Eventing

27% Hunter/Jumpers

13% Dressage

9% Trails & Recreational (English)

4% Trails & Recreational (Western)

3% Foxhunting

7% Other

Interestingly, the typical OTTB owner is a female (95%), amateur (80%) competitive rider (78%). As the study shows, Thoroughbred horses are smart, athletic and extremely adaptable. Some are spirited, but this is certainly not true of all of them. In Could a Thoroughbred Be Your Next Horse? Amy says that inconsiderate or unknowledgeable owners are responsible for giving the breed a bad name. Her experience of fostering many OTTBs has revealed that Thoroughbreds have an excellent work ethic and are very intelligent. “They just want to know what their job is and then have you allow them to do it.”

The breed varies in height between 15 and 17 hands. Bay is the predominant color, the others being gray, chestnut, brown and black. The average lifespan is 25 – 28 years and they can live up to age 30. So where do they go after retiring from racing as youngsters?

Why Off Track Thoroughbreds Need a Plan B

Kimberly Clark, who rescues and retrains OTTBs at Leighton Farm, writes: “On average, 30,000 Thoroughbreds are bred in the U.S. each year for the purpose of racing….and the majority of them will be retired from racing by the age of 5.”

Thousands of them then become unwanted. Many end up in killer pens, and Thoroughbred rescue organizations work hard to give as many of these animals as possible the chance of a new life in a good home.

The OTTB Edge

Clark’s excellent manual “New Track, New Life” explains that the OTTB has been well-handled from the age of two and exposed to cars, trucks and tractors. He’s been around many different people, and worked with and around other horses.

These professionally started animals have also traveled extensively, ‘been there, done that,’ and learned to take crowds and noise in their stride. As a result, they are calm about many of the things, such as busy traffic, which bother ‘regular’ horses.

Where to Look for Your OTTB

One place to start your search is The Communication Alliance to Network Thoroughbred Ex-Racehorses (CANTER), a national organization whose mission is to provide retiring thoroughbred racehorses with opportunities for new careers. Click on the state nearest you to find available OTTBs in your area. The website has an FAQ page which addresses many common concerns, including the following:

What do they cost?

This page states that the price of the horses is very negotiable. The urgency of the owner to dispose of the horse is a factor. I persuaded one owner on the track to part with his mare for nothing, because it was cheaper for him than continuing to pay the horse’s board for the next few weeks. This argument won’t always work, but it’s worth asking.

I trailered the mare straight to Leighton Farm. Several months later her thrilled new owner contacted me to say how well she and the retrained mare have bonded.

Can I ride the horse at the track?

The answer is ‘no’ except under certain circumstances. (I was done the huge favor of being hoisted into a tiny racing saddle and led under the shed row and back!)

Does CANTER vouch for the soundness and health of the horses for sale through the program?

If the horse is being bought directly from the trainer, then no. If it is a CANTER owned horse, then yes.

Purchasing Tips

Whether or not you find your new horse through CANTER, this is valuable information to help you make the best of your trip, if you go to the race track to look at prospective animals.

Other organizations which retrain and offer OTTBs for sale:

Thoroughbred Placement Resources, Inc.

Thoroughbred Aftercare Alliance

Thoroughbred Retirement Foundation

This is not a complete list.

Judging the Temperament & Soundness of Your OTTB

Temperament

If the horse is at a retraining facility, its temperament will have been assessed by the organization offering him for sale, and they will know what type of rider and riding he is suitable for.

Listings of horses still at the track give as good an indication as possible of the horse’s temperament, based on what is seen on the day the animal is visited. Often they can only repeat what the trainer has said about the horse and it will come down to your own judgment.

Physical Health

Because Thoroughbreds are raced as physically immature two and three year olds, they are prone to injury. The organizations are honest about known physical issues in their horse listings.

In any case, be sure to have your prospect vetted.

Coming Home

If your horse has just come off the track, he’ll need much patience and understanding.

After being on a lot of high-energy feed and pent up in a stall for 23 hours a day, he’ll need to be taught gradually about turn out. Reduce his feed and start him out in a small pen where he can stretch his legs but not reach a full gallop. Once he settles down you can move him into a larger field and gradually integrate him into his new herd.

Under saddle, he’s only learned to go, go, go. Says Jessalyn Zimmers, OTTB trainer: “Let them know it’s OK to take a deep breath; drop their heads and just walk. That sensible horse will start to emerge. This takes time.”

Her excellent article The Off Track Thoroughbreds Experience and Clark’s downloadable ebook “New Track, New Life” A Guide to Understanding and Retraining Your Off Track Thoroughbred give valuable insight into the lifestyle of a racehorse. They detail how to settle him into his new home and re-school him for a successful second career.


For the intermediate or experienced rider, buying an OTTB is enormously rewarding. With patient training and TLC you can have a lot of fun in his company, and he will work diligently to become your ideal equine partner.

Resources & Further Reading


OTTB Resources

Q & A: What to Look for when OTTB Shopping

Bringing Home an OTTB

OTTB Success Stories

Starting Over with Off-the-Track Thoroughbreds

Do OTTBs Make Good Competition/Riding Horses?

Living and Dying with OTTBs: Redemptive Capital and Thoroughbred Ex-Racehorse Rescue in Kentucky’s Bluegrass

Ray Paulick on racing’s future, unwanted horses

Thoroughbred Placement Resources, Inc.

Thoroughbred Aftercare Alliance

Thoroughbred Retirement Foundation


Posted in: Equestrian News, Horse Care

Leave a Comment (0) →

Equine Senior Citizens

A Health Plan for Equine Senior Citizens

A horse is considered ‘senior’ when he turns 20, which is the equivalent of a 57 year old person. You can click here to calculate your own horse’s age in human years. According to the Kentucky Equine Research Staff, “17% of the horses in the U.S. are estimated to be over 20 years of age.” That’s a high number, but with exercise and proper nutrition our older equines can stay healthy well into their golden years.

Move It or Lose It

Regular, and age appropriate physical activity builds and maintains muscle. Exercise can help prevent metabolic issues, says Kenneth McKeever, Ph.D., FACSM, professor of equine exercise physiology and associate director for research at the Equine Science Center at Rutgers. “Also, when we first started putting old horses on the treadmill and then the Eurociser machine, they were feeling better and loosening up after three sessions.”

Marijke de Jong suggests being flexible in one’s approach to working an older horse as he will have good and bad days. Don’t work senior equines on humid, hot days as they become easily dehydrated and have a hard time cooling down. Consistent exercise improves their mental wellbeing, by giving them a job and making them feel useful.

Keeping Up Appearances

Extra care is needed to keep senior horses in good condition.

Worming

Older horses’ digestive systems don’t absorb nutrients easily, and worms damage the intestines even further while stealing those nutrients for themselves. A fecal count will help your veterinarian develop an effective deworming program.

Nutrition

Fiber: Dr. Lydia Gray suggests “providing fiber that is easier to digest (higher quality hay, soaked hay cubes, beet pulp, complete feed) as well as pre- and probiotics, yeast and digestive enzymes.”

Starch: A low-starch diet is better for older equines, as their reduced ability to digest starch can lead to colic, laminitis and Cushings disease.

Protein: To maintain condition, older horses often need extra calories from a high protein feed.

Fat: Adding fat to the diet is another way to increase their calorie intake. Kentucky Equine Research suggests feeding it “in the form of vegetable oil, rice bran, or a fat supplement.”

Meals per Day: If fed too much per meal, many horses go off their food. Consider giving your older horse several small feeds a day.

Dental Care: Older horses’ teeth need floating twice a year and Scot T. Gillies warns: “Horses with terribly compromised dentition could be more likely to suffer from esophageal blockage (“choke”) or impaction-type colic.” Dental problems also lead to an inability to chew, resulting in poor nutrition and loss of body condition.

Obesity: Some horses put on weight in old age rather than lose it. As Neil Clarkson quips: “We are creating paddock potatoes.” Overfeeding invites a host of problems including metabolic issues such as insulin-related disorders, Cushing’s disease, and thyroid or pituitary problems.

Hoof Care: Advanced age doesn’t preclude the need for regular visits from the farrier to keep your senior equine sound, as long as his hooves aren’t lifted too high.

Turnout

The healthiest situation for older horses is 24/7 turn-out on good quality pasture, with equine companions who don’t bully them, and adequate shelter. It doesn’t take much effort to give our senior equine citizens the extra help they need to grow old healthily and gracefully.

Resources & Further Reading

Horse Age in Human Years Conversion Calculator

The Senior Horse

Add Years to Your Horse’s Life

Euroxciser

Updated Deworming Recommendations

Deworming Schedule for Horses

Laminitis

Weight Loss in Older Horses: Management Solutions

Senior Horse Care

Colic in Horses

FAQs About PPID (Cushing’s Disease)

Senior Horse Servings

Taking Care of the Senior Horse

Feed Needs of Older Horses

Cushing’s Disease & Metabolic Health

Feeding the Insulin Resistant Horse

Caring for Old Horses

Horse Teeth

20 Things Your Horse’s Teeth Are Telling You

What Does Floating Teeth Mean & Why Is It Necessary?

Senior Hoof Care Considerations

Keep Your Older Horse Comfortable During a Trim

Posted in: Equestrian News, Horse Care

Leave a Comment (0) →

Horse Exerciser Footing

Adding the Horse Exerciser Footing to the track is the final important step in completing your machine. In our prior Horse Exerciser Track article, we review construction considerations to develop a solid foundation for the sub base and the base of the pad to achieve proper track drainage and track support for the horses. The footing is the final construction step, and will provide your equine athletes with proper traction and impact absorption as they exerciser in the machine. There are many excellent footing options available and each offer cost and performance attributes to consider.

Performance Considerations

Impact Absorption

Horse Exerciser Footing
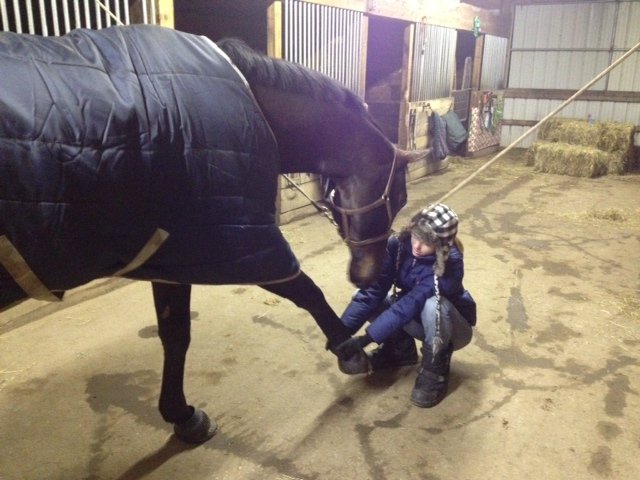
The purpose of the footing is to provide the appropriate impact absorption and support as a horse works around the track. Managing the footing and proper shoeing significantly reduces impact loads to the horse’s joints and ligaments. Barrey, Landjerit and Wolter studied shock and vibration at the hoof with different track surfaces, including asphalt, gavel, gravel+sand, sand, sawdust and sand with various mixes. Good performance is achieved with sand and sand with mixes of softs and is one of the most common fill materials used in Eurocisers. It also tends to be cost effective and locally available. There are a number of excellent synthetics that create good impact absorption and support - they do require greater investment.

Traction

The footing material must provide sufficient traction to give the horse hoof purchase as they exercise. The footing must provide this traction while absorbing the impact loads during the exercise. If the footing is too hard, the impact loads are not absorbed and can result in concussive injuries. If the footing gives too much (low shear force), the horse must work harder to generate movement and result in fatigue on ligaments and tendons, causing potential injuries. Over compensating for one attribute can often sacrifice the second attribute. It’s important to achieve a balance of traction and impact absorption.

Horse Exerciser FootingDurability

The footing material will see constant use and can break down over time. It’s important to consider the maintenance cycles and useful life of your footing to get the best performance and lowest life cycle cost before replacement. As the footing breaks down, undesired side effects can form. Soft sands and sands with high silt content that drain proper when exposed to rain, can loose their porous properties as they break down, causing lack of good drainage. Worn footing can also loose some impact absorption properties. Not all sand, synthetics and softs are equal. Investigate the best choices for your track to get the best performance for your horses.

Footing Material

Synthetics

There are a number of synthetic options available on the market that provide great traction and absorption qualities. The investment cost for synthetic footing is higher than alternatives such as sand. And if the material is not available local there are additional shipping costs to consider. We recommend working directly with the specific footing manufacturer to understand the appropriate solution for your track, and get references to understand the proper set up and maintenance of the footing system you plan to invest in. We reference a number of suppliers at the end of this article.

Sand

Horse Exerciser FootingSand is a great footing material choice, and if specified properly, is one of the best cost and performance options available. A 3-4 inch sand depth is required for the Eurociser and sets on top of the compacted base.

The quality and type of sand varies greatly region by region - not all sand is equal. Soft sand breaks down quicker. High silt content generates more dust. Greater clay content tends to have greater silt content. Round sand does not provide the same traction properties compared to angular sand. Sand can even be categorized differently based on the region you buy it. Therefor it is important to be specific about the characteristics you want in the sand. Below are the more important characteristics to be specific about when purchasing your footing.

For starters, specify sand that meets ASTM C-33. Most quarries carry this sand grade as it’s a standard construction grade, and a common sand grade used for horse arenas. The sand size ranges .05 mm to 2 mm in size, (a fine, medium and course sand mix). The specification provides requirements for the sand mix make up and limits the amount of clay and silt within the sand.

It’s possible specify washed sand to limit the silt content and clay content further. Poor quality clay has high silt content, and silt offers no benefits. In fact, silt is the larger contributor to dust production, and washing the sand allows you to remove the majority of silt. It is worthwhile to add back a quality clay material with low silt content. The clay provides impact absorption properties and helps absorb water to keep the sand moist. The mix should be 80-90% sand, 10-20% clay.

Sand has different hardness levels based on the mineral composition. Quartz/Silica sand is more durable and the preferred choice over Mica or Feldspar type sands. Sub angular and angular sand is also recommended over round sands. The angular sand interlocks under pressure, creating better traction for the horses.

How do you confirm the sand meets the requirements / characteristics you plan to buy from the supplier? Getting references from local arenas can be helpful to see how the sand is performing. Footings Unlimited suggests a simple test by taking 2 inches of sand in a glass jar, add water several inches above the sand, mix and see how much sand falls out of solution after 1 minute. Measuring the new level of sand gives a good percentage estimate of how much of the footing is sand. The remaining soluble dirt, clay and silt stays suspended until it has time to settle. You want 80-90% of the material to be sand for your footing.

Additives

Rubber

Crumb RubberRubber can be added to the sand mix to further increase the impact absorption properties of the footing. Rubber from recycled tires is most readily available and offered by numerous suppliers. Make sure the rubber is clean of debris and has no foreign material (no metal). Its possible to buy rubber material produced just for horse arenas as well. It’s important to not overload the footing with rubber, or too much give is developed within the footing. The rule of thumb is to use 1-2 pound per square foot of surface area. Depending on the size of the machine, plan 1500 pounds to 3000 pounds of material.

Wood Chips and Fiber

Wood chips and fiber are also an option. Care must be taken to keep the track moist as the impact absorption is developed from the wood when it is damp. Dry wood is stiffer and breaks down quickly when the horses work on the track. Hard woods work best for durability. However, wood chips do break down quicker and require periodic replenishment maintenance cycles.

Rubber Mats

Adding a rubber mat lattice layer below the footing / above the base is a great way to build a cushion layer to the track. About 3 inches of sand footing is added on top of the mat, and sand fills the gaps of the mat. It’s important to have a secure way to keep the mats down and have drainage paths beneath the rubber mat to flush moisture through the sand and mats.

Maintenance

Your track does require maintenance. It’s important to drag and rake out the footing to re-level the material and mix materials, especially in high traffic areas. It also prevents the horses from wearing down the footing to the point where the horses are working on the base of the track. If the horses reach the base, the absorption benefit is removed, and it’s possible to break down and wear the base resulting in further track maintenance.

Maintaining the moisture level in the footing is important as it keeps the material resilient to achieve the impact absorptions properties desired. The moisture content should be maintained at 5-10% by volume (water to footing content). The moisture also keeps the dust level down as the horses work on the track. If your uncertain how to judge the moisture content, pick up a digital moisture meter like a General Tools MMD4E meter. They are on line or at your local hardware store in the irrigation supplies section for about $50. Adding a ground based sprinkler system can make managing the moisture level easier. By establishing your water cycle and understanding the moisture content results, you can simplify the water maintenance cycle of the track.

Final CommentsEuroXciser

Footing is an important feature to construct with your horse exerciser. The solution doesn’t need to be an expensive approach to be effective. There are many excellent resources available based on Arena construction and management and we have referenced a few below. It‘s helpful to talk with local equestrian facilities that operate arenas to understand where they procured their footing material and how the material is working for them.

And a final note, footing maintenance is required. You do save a time with a EuroXciser machine, and it’s important for your horses and for your investment to maintain the footing. It will provide the proper support, impact absorption and traction for your horses as they exercise in the machine for many years

Reference Information

Penn State College of Agriculture - Arena Footing Material and Selection

Arena Footings: Materials, Installation and Maintenance

Footings Unlimited for Synthetic Footing Options

Footing Solutions USA

Premier Equestrian

Stable and Arena

Efficient Arena for Additives


Posted in: Equestrian News, Horse Care, Horse Exerciser

Leave a Comment (0) →

Tackling Tack Care


Taking care of horse riding equipment isn’t fun, but ignoring this task can result in the early and costly replacement of items, not to mention riding accidents. Regular tack care and inspections are as important as frequent cleaning.

Tack Care: Checking Your Tack

The Saddle

Saddle Tree

The tree is the frame upon which the whole saddle is built and is crucial to your horse’s comfort. Follow the easy steps in Testing Your Saddle Tree to see if yours is broken or twisted. A line of wrinkles across the seat of the saddle also indicates a broken tree. If you suspect anything is wrong, don’t use it on your horse until a reputable saddle fitter has checked it.

Flocking

Check that the flocking (filling in your saddle’s underside) has not become hard or uneven. Have your saddler check this every six to twelve months.

Billets

These are the leather straps to which the girth is attached. Examine them for cracking or tearing, and loose or worn stitching where they attach to the saddle. Billets last much longer if your girth has buckles with rollers, which don’t ‘bite’ into the leather.

Girth

This vital piece of equipment needs frequent checking for leather cracks, rusting buckles and deterioration in the stitching and elastic.

Stirrup Leathers

Inspect your stirrup leathers for wear and tear. Switch the left and right leathers at regular intervals: the left leather gets stretched over time from the rider putting extra weight on it when mounting. Examine the stitching for any broken or deteriorating threads.

The Bridle

Check for cracking leather and weakening stitches and ensure the buckles are not rusted through. Monitor your bit for rough edges or twisting of the metal, indicating the need to buy a new one.

Other Leather

Other leather equipment such as martingales, breastplates, or cruppers also need frequent inspection.

Leather Cleaning

After Every Ride

Removing sweat from your saddle and bridle after every use will protect the leather from its two big enemies, damp and dust. Wipe saliva off the bridle, and if you wash the bit be sure to dry the surrounding leather.

On Dedicated Cleaning Day

Schedule a time to thoroughly clean your tack when you can perform the job properly.

Step One: Dismantle

Take your bridle completely apart. Detach your stirrup leathers from the saddle and take off the irons.

Step Two: Clean

Use a soft cloth to remove all dirt. Dampen a small tack sponge (which you can find in tack stores) and rub a quality saddle soap such as Effax or Passier Saddle Soap into the leather, including those hard-to-reach places. Liquid saddle soaps such as Effax Mildew-Free or Leather New are easier to use, but more expensive.

Step Three: Condition

Apply a conditioner after cleaning to soften your leather and lengthen its useful life. Passier Leder Balsam is an excellent chemical free leather conditioner. For those with less time, Leather CPR and SmartWorks Cleather Cleaner and Conditioner are great products for both cleaning and conditioning.

Step Four: Restore

For tack in poor condition, Hydrophane Leather Dressing softens and reconditions leather, as well as waterproofing. It is highly recommended by saddlers as a reviver of old leather. Horse equipment is not cheap, and regular cleaning will extend its life. But it’s also important to check if repairs or replacements are necessary before the tack becomes uncomfortable for the horse and/or dangerous for the rider.

Resources & More Information

Checking Tack

http://www.equisearch.com/tack_apparel/english-tack_apparel/eqsaddle2881/

http://www.equisearch.com/tack_apparel/english-tack_apparel/tacksafety081097/

Leather Cleaning

https://www.chronofhorse.com/article/taking-care-your-tack-doesnt-have-be-tough

http://www.horses-and-horse-information.com/articles/0397tack.shtml

http://www.horsechannel.com/horse-keeping/tack-cleaning-tips.aspx

http://www.horsechannel.com/horse-keeping/tack-cleaning-active-ingredients.aspx

Posted in: Equestrian News, Horse Care

Leave a Comment (0) →

Horse Spring Grass: Problems & Solutions

Horse - Spring Grass

It’s wonderful to see green shoots sprouting again after the gloomy winter months. Instead of having to haul heavy hay bales around the barn, we can finally let our equine buddies graze all day. But the transition from hay to spring grass can bring complications with it. Not all horses cope well with the sudden switch, and appropriate management may be necessary if negative symptoms appear.

The Problems

Intestinal

Spring grass contains sugars, protein and carbohydrates in much higher levels than are present in most hay types. Overloading the horse’s digestive system with these nutrients upsets the sensitive balance of micro-organisms in the intestinal tract.

Cool season grass (such as spring grass) contains fructan, a complex and easily fermented sugar. As Kentucky Performance Products explain:

“Instead of being digested in the foregut, fructan passes into the horse’s hindgut, where it ferments and causes the production of lactic acid. Too much lactic acid reduces the pH of the hindgut, and these changes “negatively affect the delicate microflora that live in the hindgut and aid in digestion.”

This can lead to bloating, diarrhea, colic and laminitis (see below).

Obesity

Many horses continue to eat well during the winter while getting little or no exercise. Spring grass puts these already plump animals at high risk of becoming obese. The incidence of obesity in horses is upwards of 45%. Being chronically overweight has many adverse effects on horses, including:

  • heart disease
  • lung problems,
  • intolerance to exercise
  • inefficient thermoregulation (over-heating)
  • obstructions in the intestinal tract
  • colic
  • insulin resistance (see below)
  • EMS (equine metabolic syndrome)
  • laminitis

Incorporating an exercise routine with a horse exerciser can help during the winter months.

Insulin resistance

Insulin is used by the body to metabolize sugar and starches (carbohydrates). When a horse is insulin resistant, its cells no longer respond to the insulin. This results in wasting of the muscles. Other signs of insulin resistance include:

  • fatty deposits, particularly on the crest, rump and over the eyes
  • polyuria (excessive urinating)
  • polydipsia (excessive drinking)
  • insatiable appetite
  • laminitis

If caught in time, insulin resistance is reversible through weight loss and exercise, according to Zoe Davies MSc.Eq.S.,R.Nutr. So seek prompt veterinary attention if your horse shows signs of IR.

Laminitis

Laminitis can be an extremely painful condition for horses. Symptoms include:

  • The horse is uncomfortable standing in the same position for any length of time and constantly shifts his weight from one leg to the other.
  • The horse appears to be trying to take the weight off his front legs
  • Choppy and/or stiff gaits.
  • Shortened strides on harder surfaces which were not problematic for the animal in the past
  • Soreness in the back, even though the saddle fits properly

Consult your vet immediately if you suspect your horse is suffering from laminitis.

A Hot Horse

Many riders notice that after grazing on spring grass their horses become spooky, nervous and excitable. In extreme cases they are impossible to ride. In addition to the sudden increase of sugar in their diet, the cause of this behavior is the insufficient level of magnesium in spring grass. Performance Equine, in Magnesium: The Mineral Superhero describes it as being “by far the most important mineral, activating over 300 different biochemical reactions all necessary for the body to function properly.” It’s not surprising that the lack of such an important element can lead to bad equine behavior.

The Solutions

Pre- and Probiotics

These can help the horse’s digestive tract function correctly by maintaining the microbial balance in the hind gut.

Prebiotics, as Triple Crown Feed explains, “are not microbes, but ingredients that help the microbial populations in the hindgut remain stable and healthy. A prebiotic …… enhances the quality of the microbe population that’s there.”

Probiotics are micro-organisms which, when fed live to the horse, introduce viable ‘good’ bacteria and encourage a healthy digestive environment. Check that the cultures in any probiotics you choose were not killed while being processed. Horses appear to benefit more from a continual supplementation of probiotics to their diet than occasional use. Companies such as Succeed or SmartPakEquine sell high quality equine digestive supplements.

Restrict Grazing and Feed Hay

It’s a good idea to alternate grazing with feeding hay while the young grass is coming through. There are certain times of day when it is safer to let your horse graze,such as the morning when the daytime weather is sunny with warm nights, and on rainy, wet days. Give hay each time your horse comes off his pasture. The slow fermenting fiber will help counteract the effects of the fast fermenting sugars in the spring grass.

Reduction of Feed

Eleanor Kellon, VMD says that “for ideal health, your horse should be maintained at a body condition score of 5.” She is referring to the Henneke body condition scoring system which describes the ideal horse this way:

  • Neck blends smoothly into body
  • Withers are rounded over spinous processes
  • Shoulder blends smoothly into body
  • Ribs cannot be visually distinguished, but can be easily felt
  • Back is level
  • Fat around tailhead beginning to feel soft

If you reduce your horse’s feed, ensure he still receives enough nutrients. Talk to your veterinarian about how best to safely bring down his weight if he’s getting fat.

Introduction of Low Starch Feed

For obese or insulin resistant horses low starch feeds are a good solution. They also prevent the sudden sugar rush some horses get from regular feeds. This makes them more excitable and nervous, especially if they’re already getting a sugar high from the grass, and leads to other health issues. Discuss with your vet about using nutrition to help avoid the onset of problems due to spring grass.

Addition of Magnesium Supplements to the Diet

Spring grass is higher in potassium and nitrogen with less magnesium than more mature growth. Among its many functions, magnesium is essential for the regulation of blood sugar levels and the thyroid. Insufficient magnesium is partly responsible for equine metabolic syndrome and obesity, both of which can lead to laminitis. And as we discussed above, a lack of magnesium can create severe behavioral issues. You can redress the balance by supplementing your horse’s diet with a magnesium product such as Quiessence from SmartPakEquine.com or MagRestore from Performance Equine. Spring grass presents tough health challenges for some horses, but there is much you can do to offset them.

Resources & Further Reading

General

http://www.safergrass.org/pdf/JEVS8-05.pdf

http://www.equisearch.com/farm_ranch/pasture/spring-grass-cautions/

http://www.succeed-equine.com/succeed-blog/2011/05/26/tips-for-spring-grass-management-to-avoid-colic-and-laminitis/

http://www.thepurefeedcompany.com/nutrition/coping-with-rich-spring-grass

http://summit-equine.com/understanding-fructans/

Obesity

https://www.bluecross.org.uk/80161-80160/obesity-in-horses.html

http://www.thehorse.com/articles/32005/understanding-and-managing-equine-obesity

http://www.thehorse.com/articles/33375/health-concerns-related-to-equine-obesity

Insulin Resistance

http://www.balancedequinenutrition.com/IRArticle.html

Laminitis

http://www.ahf-laminitis.org/p/faq.html

http://www.balancedequinenutrition.com/IRArticle.html#laminitis

http://gainfeeds.com/horse/wp-content/uploads/2013/04/laminitis.pdf

Pre- and Probiotics

http://www.thehorse.com/articles/30918/pre-and-probiotics-for-horses

http://csu-cvmbs.colostate.edu/Documents/equine-probiotics.pdf

http://www.triplecrownfeed.com/horsefeedblog/equine-digestive-health-probiotics-prebiotics/#sthash.yBtC7JnE.dpuf

Low Starch Feeds

http://www.ker.com/library/equinews/v14n2/v14n209.pdf

Magnesium

http://www.performanceequineusa.com/magnesium-themineralsuperhero.aspx

http://www.naturalhorseworld.com/Articles-Nutrition.htm#magnesium

http://equestrianlady.blogspot.com/2011/03/is-your-horse-high-on-spring-grass.html


Posted in: Equestrian News, Horse Care

Leave a Comment (0) →

4 Versatile Horse Breeds

4 Versatile Horse Breeds for English & Western Riding

If you enjoy both English and Western riding, you may think you need a separate horse for each discipline. But fortunately some breeds can be ridden in both English and Western and here are 4 examples for riders in all height and weight categories.

Clydesdale

Made famous by the Budweiser ads, these horses are not just pretty pullers of beer carts. They are very sensible under saddle, and can make good jumpers.

Their kind and gentle dispositions are ideal for the more nervous rider who wants to ride English or Western dressage at the lower levels, in Western pleasure classes or on the trails.

Clydesdales stand between 16 and 18.2 hands high and weigh between 1,800 lbs. and 2,200 lbs. suiting the upper height and weight rider categories.

Clydesdales crossed with Thoroughbreds produce great all-round horses with better jumping ability, which also accommodate riders of lesser height and weight.

If you need added agility and speed for barrel racing, consider a Clydesdale/Paint or Quarter Horse cross: they can all be ridden in both the English and Western style.

Percheron

This intelligent, gentle and willing draft breed was originally a war horse. He was then used for pulling stage coaches, before switching to agricultural forestry work.

Yet now the Percheron is a popular riding horse for English and Western pleasure. (Although he won’t make a fast barrel racer!)

The purebred Percheron’s height ranges from 15 to 19 hands, and he weighs between 1,100 lbs and 2,600 lbs., making it possible for riders within a wide range of stature and weight to find a suitable mount of this breed.

Also sought after for English and Western riding are Percherons crossed with Paints or Thoroughbreds. They are lighter boned and quicker on their feet, while retaining the sane brain for which the Percheron is renowned.

The American Paint Horse

Although generally thought of as Western horses because of their Quarter Horse blood, Paints are recognized as great English riding horses, too. Previously considered outside the norm at English shows, their color patterns have now become firm favorites.

Paint Horses range in height from 14.2 to 15.2, and weigh between 950 lbs and 1,200 lbs. They are at home in the dressage arena (English or Western), the jumping stadium, the cross-country course, rounding up cattle or barrel racing.

This fleet-footed animal is fun to own and comes in many different colors. The American Paint Horse Association describes him as ‘having athletic ability and being agreeable.’

Morgan

This little horse has it all. Compact, strong and powerful, the Morgan makes a good barrel-racer, Western pleasure and cutting horse, English jumper and eventer, English and Western dressage horse as well as endurance horse.

His height is anywhere from 14.1 hands to 15.2 hands, with some individuals standing a little taller. Usual colors are bay, black or chestnut.

The Disciplines & Uses page for this breed lists no fewer than sixteen different areas in which the Morgan excels!

Not only that, but he has a gentle disposition and steady temperament. He is an easy keeper, meaning that he is not hard to maintain at a good weight.

Because these horse breeds perform well in both the English and Western disciplines, you can have the whole package in a single horse. This makes riding much more interesting and a lot of fun!

Posted in: Equestrian News

Leave a Comment (0) →

Tips Trying Out New Horse

5 Essential Tips Trying Out New Horse

You’ve created an impressive short-list of horse candidates. One of them will become your new equine soul mate and it’s simply a matter of trying them all out to find him.

But before you arrange to ride every single horse, check out these 5 tips. They’ll avoid a lot of wasted time and help you find your new horse safely.

1. Ask a Lot of Questions

Prior to dialing the seller’s number, write down questions to ask.

The horse’s advertisement should contain a lot of detail about him, but some information will be missing. And it doesn’t hurt to ask about something that’s in the ad to see if you get the same answer over the phone. For example, what is the horse’s height and age? You’d be surprised at how written ads and verbal answers vary.

Here are more questions to ask, where relevant

  • How many years has he been with his present owner?
  • Has he had more than one owner?
  • What is the reason for selling him?
  • What level of expertise is the horse’s current rider? Have the seller tell you this before volunteering your own riding ability. Don’t provide the seller with cues to say the horse will be perfect for you even if it’s not true.
  • What is his temperament?
  • How often is he ridden each week?
  • When was he was last ridden? This is important to know!
  • Is the horse on any medication? E.g. for arthritis or allergies.
  • Is he being given any supplements? If so, what and why?
  • How much does the horse weigh?
  • Is he easy to catch?
  • Is the horse accustomed to pasture board or is he usually stabled part of the day?
  • How much turnout is he used to?
  • Does he have any allergies?
  • Can he be turned out on spring grass? Has he ever had laminitis?
  • Does he behave well in cross-ties?
  • Is he easy to clip?
  • Does he behave well for the farrier? Does he wear shoes, or go barefoot?
  • Does he load easily?
  • Has he been to competitions? In what discipline and what level?
  • Is he good on the trails by himself?
  • Does he mind being at the back, front or middle when ridden out in company?

If you’re satisfied with the seller’s attitude over the phone and his responses, it’s time to make an appointment to see the horse.

Equine Legal Solutions has a very useful Horse Buying Checklist to print out and take with you.

2. Enlist the Help of an Experienced Horse Person

Taking a knowledgeable horse person with you is invaluable: her cool head will prevail in the event of your falling in love with the wrong horse.

Her presence will also encourage the seller to be more upfront about the animal for sale, in a subtle case of two against one.

The best person to take along with you is your instructor. Check that she’s available when you need her, and how much she charges.

Alternatively, take a trusted horse friend with you for the preliminary visit, and ask your trainer to come for the second look. Or take a video of the horse to show her. Whomever you take, ensure they have a good eye for the discipline you need the horse for.

3. Observe the Horse on the Ground

When you arrive, sellers often have the horse already tacked up. The reason for this might simply be to save time - but it could be more ominous.

Say that you want to watch the horse being caught and led in from the field. Good ground manners are vital to your safety around the horse.

Observe him in the cross-ties and how he behaves when being groomed. You may even want to brush him a little yourself to get acquainted.

If you and your horse friend/trainer feel comfortable about his behavior so far, watch him being tacked up and led to the riding arena.

4. Don’t Get on First

Never be the first to get on the horse. No matter how quiet he allegedly is, you must insist the owner ride him before you do. (If he refuses, walk away.)

With your friend/trainer, watch the horse’s gaits in both directions. Is he sound? Is he quiet and obedient? Does he exhibit the temperament you’re looking for? Does he have the movement you need for your riding discipline?

If you’re looking for a jumper, how is his approach and take-off? Is he calm before and after the jump?

Lastly, does the horse enjoy his work? Are his ears pricked forwards, or pinned back all the time? Does he swish his tail?

Only get on the horse if you feel comfortable. You’re not there to impress anyone with your riding ability, so don’t feel under pressure to get on him if your gut tells you he’s wrong for you. There’s no shame in saying: ‘No thanks, he’s not what I’m looking for.’

5. Ride the Horse in a New Environment

If after your ride you and your ground person feel good about this horse, it’s time for the next tryout phase.

He may have behaved well for you at his barn, but how is he in strange surroundings? The only way to find out is to ride him somewhere new.

Watch him load into the trailer. If he’s naughty, you’re better crossing him off your list, unless you’re willing to put a lot of work into re-training him. At least you’ll know what you’re dealing with!

Follow his trailer to watch how calmly he travels.

Observe how well he unloads and reacts to a new place.

It’s smart to have the seller ride him first again. If the horse also behaves well when you ride him, he’s a serious contender. Thank the seller very much for his time, as he’ll have now put a lot of effort into doing what you asked.

If you’re interested in buying him, say you want the horse vetted – by your vet, not his!

Now is the time to ask about trial periods if this is something you want and make sure both parties agree on their individual obligations in writing.


Trying out a new horse is very exciting. But our hearts have a tendency to rule our heads, and we can easily come home with the wrong animal. Remember, a bad horse costs just as much to buy and keep as a good one – and is much harder to get rid of!

Following these 5 tips will help you find your perfect horse, and keep your money firmly in the bank until you do.

Posted in: Equestrian News

Leave a Comment (0) →

Safe Trail Riding Tips

7 Tips for Safe Trail Riding

Exploring the countryside on horseback is enormous fun when you’ve mastered the proper horse riding techniques. Before embarking on your next adventure, you can further increase your safety on the trails with these 7 tips for safe trail riding.

Ride with a Friend

No matter how experienced a rider you are, or how quiet your horse is, it’s safer not to ride alone. If either of you gets into trouble, someone’s there to help.

But if you’re training a horse to go out by himself, tell someone where you’re going and when you’ll be back. That person can then conduct a search if you don’t return on schedule.

Take Your Cell Phone

Have your cell phone on your person. If it’s on the saddle and you fall off, your horse will bolt home with it. A cell phone enables you to call for help or let your barn family know you’ll be back later than expected.

You can get cheap cell phone cases which strap to your arm or leg.

Ride a Sensible, Regularly Exercised Horse

My local trail riding association conducts its annual outing opposite my house, and the riders set off in groups of three – which is very sensible.

However, at least one person takes a horse which hasn’t been ridden for months. Several miles out, the animal dumps his jockey and roars home. These incidents invariably involve a rescue helicopter.

Ride your horse regularly at home before taking him on the trails!

Ride on a Calm Day

Most horses become spooky in strong winds, even in familiar surroundings.

Especially if you’ve not taken your horse trail riding for some time, or if he upsets easily, wait for a calm day before venturing out.

Avoid Steep Hills If….

Hills are useful for muscling up a horse and increasing his stamina. But it’s not smart to ride steep ones, especially:

In wet conditions, as there’s the risk of slipping

If you’re on a hot horse.

Unless you’re an experienced rider who can handle the animal, a steep downward slope is where he’s likely to buck you off.

If you’re not used to riding acute angles.

Read Hill Riding Safety and find some gentle slopes to practice on.

Take a Hoof Pick

When a horse suddenly goes lame on a trail ride, it’s usually from a stone or other sharp object stuck in his hoof.

If you’ve brought a hoof pick, you can dismount, quickly remove the item, remount and be on your way again on a sound horse. This is preferable to walking home!

Practice Unconventional Mounting

In situations like the above you’ll have no mounting block to help you back into the saddle.

At home, practice getting on from unfamiliar objects, and mounting from the right side.

Then it won’t be a problem if you have to mount from a tree stump or from the ‘wrong’ side when you’re out on the trails.

Taking these 7 simple precautions will add to the safety and enjoyment of your trail rides, and improve the quality of time spent with your horse.

Further Reading

Common Sense on the Trail

Trail Riding Safety Tips

Posted in: Equestrian News

Leave a Comment (0) →

Perfect Boarding Barn

What to Look For in the Perfect Boarding Barn

Keeping your equine partner at a horse boarding barn is not cheap. If the facility is poorly maintained or has an unfriendly atmosphere, you’ll be paying good money to be unhappy. But with smart investigating you can find the perfect boarding barn for you and your horse.

Take this list on your barn trips to help you ask the right questions.

Horse Care

Horses’ Appearance

  • Do the horses appear healthy and content?
  • Or are they thin and dejected?
  • Are any of them coughing? Do they have runny noses?

Stalls

  • Stall dimensions of at least 12’ x 12’ are preferable. Your horse will spend many hours in there and needs room to move around comfortably.
  • Are the stalls clean with enough bedding? Make sure your horse can lie down without scraping the floor and that stalls are cleaned at least once a day.
  • Can the horses see their neighbors? Being social creatures, horses like to see their fellow boarders.

Barn Ventilation

  • Is there a gap between the top of the outside walls and the roof to let air in? There should be no gaps in the walls themselves.
  • Does the barn let in natural light?
  • Is there dust in the air?

Aisles

  • Are the aisles free of dangerous items like pitchforks and wheelbarrows?
  • Are they wide enough to pass through easily?

Pasture

  • How large are the pastures?
  • Do they contain grass or are they overgrazed? If he has insufficient grass your horse will get bored and be miserable.
  • Are there too many horses in each field?
  • Are the horses compatible? Is there any fighting?
  • Is the fencing safe and secure? Barbed or regular wire is extremely dangerous to horses.
  • Is there broken fencing? This can cause injury.
  • Is there debris in the field? It must be clear of anything which could harm your horse.
  • Is there adequate shelter for horses on pasture board?

Turnout

  • What are the winter and summer turnout hours?
  • Is turnout at least 8 hours a day? (Or whatever number of hours you’d like for your horse.)
  • What is the inclement weather policy? Most barns don’t turn out if it’s raining. If the weather is bad for days on end, your horse will be stuck in his stall: you’ll need to exercise him more often.
  • What care is provided if your horse is sick?
  • If he’s on stall rest, will you have to pay extra? He’ll need additional stall cleaning and hay, so it’s not unreasonable to pay more, but you’ll want to know how much!

Hay

  • Hay is expensive: here’s where unscrupulous barn owners save money.
  • Is the hay of good quality? Is it musty?
  • Is it the right type of hay for your horse?
  • Are the horses given separate piles in the field to prevent bullying? Watch for bossy horses preventing the others from eating.
  • How much hay will your horse get daily? If you have a large horse he will need more hay than the average.

Water

  • Clean water must be available AT ALL TIMES!
  • Do the horses have 24/7 access to water in their stalls and in the field?
  • Is there more than one trough in the paddock, so dominant horses can’t prevent the others from drinking?
  • Are the water buckets and outdoor water troughs heated?
  • How does the barn deal with the problem of ice in winter?

Feed & Other

  • How often, how much, and what are the horses fed?
  • Can you bring your own feed? You don’t normally get a break in price if you supply your own.
  • Supplements and medication - Does the barn add these to the feed free of charge?
  • Is worming included in monthly board?
  • Are blankets put on and removed as necessary?
  • Will a staff member hold your horse for the farrier or vet? At what charge?
  • Security and safety - What type of insurance and security does the barn have? What insurance do you need?
  • Must the horses be vaccinated? Do all the horses need a negative Coggins? If the answer is ‘no’ to either question, avoid the barn at all costs!

Rider Care

Riding Facilities

  • Is there a riding arena? Does it have an all-weather surface?
  • Can it accommodate the number of boarders?
  • How often is it occupied by lessons? Do lesson times conflict with when you can ride?
  • Is the footing too deep or shallow?
  • Is the arena regularly graded to ensure a smooth and safe riding surface?
  • Are jumps available, if you need them?
  • Is there clutter in the arenas? Equipment left lying around is aggravating and potentially dangerous.
  • Are there neighboring riding trails?
  • Does the barn have a free style horse exerciser? This is extremely useful for those days when you can’t ride. A covered walker is even better, as it allows you to exercise your horse during inclement weather.

Storage and Bathroom Facilities

  • Is there a locked tack room for your saddle and bridle?
  • Is there storage for your other horse equipment, such as blankets and grooming kit?
  • Is there a restroom?

Riding Instruction

  • Must you use the barn’s instructor or can you bring your own?
  • If you have to use the barn’s instructor, watch several lessons. Is he/she the right fit for you?

Hours of Operation

  • What are the barn hours? Are you locked out on holidays?
  • Can you come late, after work?
  • Can you come early in the morning before work?

Ambience

  • Hang around the barn and soak in the atmosphere.
  • Is everyone friendly and welcoming?
  • Is this a one-discipline only barn?
  • You’ll feel more comfortable if some boarders ride the same discipline and at the same level as yourself.
  • Do the riders treat their horses with kindness and consideration?

You and your equine partner will spend a lot of time at the barn. You both need to be happy, so take your time and check out a lot of places. When you find the ideal barn, you’ll be very glad your research was so thorough - and so will your horse.

Further Reading:

What are some good questions to ask a new boarding stable?

Questions to ask a boarding stable

How to Be a Great Boarder

Posted in: Equestrian News, Horse Care, Horse Exerciser

Leave a Comment (0) →

Horse Exerciser Track

Constructing the Horse Exerciser Track

Horse Exerciser FootingThe Horse Exerciser Track beneath the EuroXciser is an important feature. There are many construction options to consider prior to installing the machine. What are the required steps to build a solid track base? What material should be used for the footing? How much footing material is needed? What planned maintenance cycles are needed? Getting the track correct enables the support, traction and cushion required for your horses as they exercise in the machine. In this two part blog, we review the construction approach with the associated tradeoffs for the horse exerciser track. The steps are similar to constructing a horse arena, with the track receiving more repetitive path use. In our second blog, we review building the Horse Exerciser Footing that sets on top of the track base.

Start with a Solid Foundation

Horse Exerciser Track setupNow that you have selected the location of your EuroXciser, it’s time to build a solid foundation for the machine, with the desired quality of solid compacted ground. The picture to the right shows the general arrangement of the track, consisting of the sub base, geotextile cover, base, footing and fencing.

The initial work scope focuses on the sub base at the planned machine location. Although the horses exercise on the track, it is important to prepare the entire machine pad to achieve a consistent grade, compaction and drainage so the track performs as desired.

  • Scrape the organic and surface soil to expose the sub soil ground. This may vary from a few inches to 6 inches or more. The goal is to reach the sub soil / sub base ground.
  • Grade the sub base pad area flat - 0% grade - so the track provides an even surface for the horses to exercise on
  • Establish a slight grade within the static ring area to facilitate water drainage from the center.
  • Compact the sub base to near maximum density

The compaction should be 92-97% if using the Standard Proctor Density per ASTM D698. The soil type may vary depending on your geographic location. A licensed contractor in your area will understand this and know how to achieve a near maximum compaction based on the soil type being more granular to more cohesive. In some cases, adding material is required to improve the sub base such that it compacts properly. The end result will be similar to a unpaved road base; firm compacted ground.

During this phase, the following should also be constructed:

  • the drain system/drain lines for the center ring.
  • the electric runs from the power drop, to the planned controller and machine center.
  • the cement mounting pad for the machine base.

IMPORTANT: Do follow to the manufacture’s power and install requirements. Do use a licensed contractor and meet local codes and requirements. Do have the existing underground lines marked before any construction grading or trenching occurs in the planned area for safety reasons and cost of damage reasons.

Horse Exerciser Track Base

Geotextile Fabric with Base

If the sub base has aggregate rocks, it’s worth while to add a geotextile fabric on the track between the sub base and the base. The fabric keeps the rocks from moving up into the base and footing of the track. Once the fabric is placed, add the base material on-top. There are many options available for the base material. The overall goal again is to create a solid surface. Local material can influence the best cost options, and some common choices include (and are not limited to):

  • “A” gravel topped by stone dust (also known as bluestone, #10 screening, limestone screenings),
    Horse Exerciser Geotextile Base

    Geotextile Fabric prior to Base Material Add

  • Granular “D” material,
  • Decomposed Granite (DG)

The base should be at least 4 inches thick, and compacted to 92-97%. Like the sub base, the base must be flat - 0% grade. The correct moisture level during the compaction process will yield a road like base. A properly constructed sub base and base will provide:

  • a flat track surface for the horses to exercise on
  • a durable surface that does not rut or sink
  • a stable surface to add footing to control the impact absorption qualities desired
    Horse Exerciser Track DG

    DG Base Prior to Footing Material Add

Getting the grade and the compaction correct is key to having a solid durable track. An example of a DG base is shown to the right. Porous asphalt is also an option for the base, and creates a solid base to build your footing from. An example of a porous asphalt track is shown to the lower right.

Most manufactures suggest the machine mounting pad be constructed a certain height above the grade, such that after the final base is completed and the footing is added, the partitions are at the correct height relative to the ground. Review this information ahead of time so you can plan out the steps to meet these requirements. With the track, pad, electrics and drainage set, it’s time to install your horse exerciser machine.

In our next blog we will review choices and options for the footing to provide the right impact absorption and traction for your horses.


Horse Exerciser Porous Asphalt Base

Asphalt Base Prior to Footing Material Add

Posted in: Equestrian News, Horse Exerciser

Leave a Comment (0) →

Horse Exerciser Purchase Considerations

Horse Exerciser Purchase Considerations

What to consider when purchasing a Horse Exerciser?

This is an investment that will improve the performance and health of your horses. It opens training opportunities to build endurance base, interval strength, and rehabilitation work at prescribed speeds, durations and reverse directions. It’s also an investment into your facility, improving the value of your property, and marketability of your equine services. It’s important to consider the following during the purchase process:

  • Capacity you require – how many horses do you plan to exercise on this machine per day? In a given day, how many 30 minute to 1 hour sessions are you planning? Or if you are an endurance horse racer, how many 2-4 hour sessions are you planning per day? Make sure the manufacturer has built the machine for all day use, every day, common in competitive sport horse facilities. Purchase for your long term capacity plans at your facility. It’s easier to not use the capacity than not have it.
  • Work Plan – do you plan to walk the horses or move them through trot and canter paces? It’s important to move into larger diameter machines if you plan work sessions at trot plus gaits. The same goes for rehabilitation work – larger turn radius means less stress on your horses.
  • Set-up Location – The work flow of your facility is important to think about. You want easy movement from stalls to the machine and back. You may want a staging area if the stalls are further away as you move the horses through the machine. And if you have heavy rider traffic, make sure the machine location does not disrupt this flow. Power drops are also an important consideration. Many of these machines operate on single phase 220v power, and the closer the machine is located to the power drop, the less investment you must make in setting up power to the machine.
  • Can weather disrupt your training plans? Make sure you have well planned drainage where you locate your machine. And consider if you need to make a greater investment for a roof cover or an indoor machine if sun, heavy rain or snow will disrupt your training plans.
  • Be familiar with your local permitting requirements and use a local general contractor to help with your install to meet local requirements as applicable.

Understand the safety considerations the manufacture has employed in their machine. A horse exerciser machine is often a one time buy for a facility, so consider your future needs and purchase to these needs. We have worked with existing customers that underestimated their needed capacity, and later upgraded to larger machines, and even add additional machines. When purchasing a machine, we recommend keeping the following in mind:

  • Buy a machine with an in-line drive train without belts or chains. We get requests to replace other manufacture’s bases to our set-up to eliminate reliability problems associated with belt drive and chain drive systems. Stick with motor/geared systems in your purchase requirements.
  • Quick support for service. The machine becomes an integral part of the facility work activities and it’s important to get quick response for service needs.
  • Reliability and outdoor use design considerations the manufacturer has incorporated into their machine

Horse Exercisers never replace good horsemanship and the real need for riding and training your horses for competition. A horse exerciser is an extremely useful training aid to build endurance conditioning, improve health and wellness and help with rehabilitation and recovery of your horses. And the benefits can be achieved by your trainer over a larger group of horses, without large labor investments in riders. Horse Exercisers are true time savers and help you meet your training goals with your competitive horses.

What are the Benefits of a Horse Exerciser over a Horse Walker?

Horse Walkers are staple training machines used at equestrian facilities. The machine tethers the horses to overhead beams, and carousel the horses in a circle. Many of the Walkers are 20-30′ in diameter, and larger models go past 60′ in diameter with up to 6+ horse capacities. The Walkers are useful and allow walking gait exercise. The machines have a relatively low purchase and install costs, making them an attractive training aid for equestrian facilities. The limitation relates to speed work and and restricted movement.

Horse Exercisers are an improved training aid when compared to Horse Walkers. The Exercisers operate without the horses tethered to the machine. This allows natural movement from walk, trot and through canter gaits. Eliminating the tethered connection between the horse and machine creates a few more benefits; namely, the horses’ can’t pull on the restraints to stall the machine or break loose from the machine. Without horses to tug on arms, the horse exerciser machine diameters can increase significantly, allowing less turning stress, making the machines ideal for rehabilitation work and faster speed training.

Posted in: Equestrian News, Horse Exerciser

Leave a Comment (0) →

Compete in Dressage

Are You Ready to Compete in Dressage?

You’ve been taking dressage instruction for a while now, and are tempted to take your horse to a show.

While the idea of taking part in a competition is exciting, you’re unsure if you have sufficient training for dressage riding in public. After all, you want to enjoy the experience, not be humiliated!

Take heart: you’re probably much better prepared than you think.

Attitude Checklist

Your attitude to showing will have a big influence on what you get out of your big day.

  • Are you happy to be at a show, whether you place or not?
  • Do you want to use the incentive of upcoming competitions to improve your riding?
  • Do you regard showing as an opportunity to see how your riding fits in with other riders at your level?

If you answered ‘yes’ to any or all of the above, your first show will be a success.

Dressage Movements Checklist

Once you feel comfortable with the following movements, you’re ready to compete. Remember I said, comfortable - you don’t have to be perfect!

“That’s all?” you ask.

Yup! Now let’s find the right tests for you.

Choosing the Right Dressage Tests

Download Introductory Test A and Test B from the United States Dressage Federation (USDF) website. These tests require only walk and trot, which makes them ideal for the beginner to dressage competitions.

  • Plan to ride both tests at the show.

During the first test you’ll be getting used to the competition arena. In the second test you’ll be much more relaxed, and get a higher percentage score.

  • There are two arena sizes, small and standard. Most shows use the standard 20 x 60 meter arena, as it’s also required for the higher levels.

Download a diagram of the standard arena and familiarize yourself with the arena letters.

(Don’t bother learning the location of the letters R,S,V and P. They don’t come into play yet.)

  • Memorize both your tests.

Don’t panic: you’re allowed to have someone read out the test movements for you at the show. A friendly voice during the competition will go a long way to calming your nerves!

Where to Find Competitions

Check online and at your feed and tack stores for information about ‘schooling dressage shows.’

These are events organized by local dressage associations and barns. They are much less formidable, and cheaper to enter, than the licensed shows which are run by the USDF and FEI (Fédération Equestre Internationale).

You can wear normal riding clothes for schooling shows, and don’t have to braid your horse’s mane. The judges are very encouraging - they want you to succeed.

If you aim to have fun at your first dressage competition, you’ll be relaxed and so will your horse. This will guarantee an enjoyable show day and set the stage for many more in the future.

Posted in: Dressage, Equestrian News, Horse Care

Leave a Comment (0) →

Easy Dressage Exercises

Seven Easy Dressage Exercises for Newcomer

When beginning dressage, the aim is to let your horse find his natural rhythm and release any tension. But relaxation in the rider is also important. These 7 simple exercises dressage exercises will help both you and your horse unwind and develop mutual trust.

Get Into the Rhythm: 4 Walk Exercises


1. Positioning Yourself for Success
Developing a correct dressage seat is the key to effective riding.

a) Sit tall in the middle of the saddle without hollowing your back, and place weight evenly on both seat bones.
b) Let your legs hang at a comfortable length. If you stretch them down too far, you’ll be ‘fishing’ for the stirrups.
c) Position your legs in such a way that if someone suddenly removed the horse from under you, you’d land on your feet. This will put you in perfect balance.


Holding the Reins

a) Each rein fits through the ring and little fingers of the hand, threads across your palm and out between your thumb and forefinger. Hold your hands in a gentle fist with your thumbs up, a little in front of you. Place them just under two hands’ width apart.
b) Relax your arms at your sides, with elbows bent.


2. Moving Off
Every riding session should begin with at least 10 minutes in the walk.

a) With a light rein contact (feel of the horse’s mouth) move your seat as if you were polishing the saddle from back to front. This is your driving seat: it asks the horse to move forwards.
You may also have to apply some leg pressure until the horse understands that he is to move off your driving seat only.
Your seat is the principal aid (communication with the horse) for controlling the horse’s rhythm, his speed, the length of his stride and transitions (changes in gait).
b) Next, adopt a passive seat, which simply follows the horse’s motion and lets him continue forwards in the regular four beat walk tempo.
c) Walk on a 20 meter circle on the left rein a few times. Relax in the saddle and allow your horse to move freely without rushing.

3. Changing Through the Circle
It’s now time to switch direction

a) Squeeze the fingers on your outside rein, for a brief moment of increased contact with the horse’s mouth. If you’re traveling to the left, your right rein is your outside rein.
This squeezing is called a ‘half-halt’ and tells your horse to be ready for something new.
(Another function of the half-halt is to regulate his tempo when combined with the stilled seat as in Exercise 4 a) below.)
b) Now ride an S shape through the circle to walk in the other direction – called ‘changing through the circle.’
Keep the horse moving at the same tempo in the new direction.

4. Walk-Halt-Walk Transitions
Transitioning between walk and halt improves communication between you and your horse.

a) Transition from walk to halt.
To halt your horse, apply the preparatory half-halt, and use a stilled seat: grow taller in the saddle, lengthen your legs and stop moving your hips with the horse’s movement until he stops.
b) Alternate between halt and walk.
Use your driving seat to move off in walk, your passive seat to continue walking in rhythm, and your stilled seat for halt. Remember to prepare your horse each time with gentle half-halts.
c) Practice walk to halt and back to walk until your horse responds immediately to your seat aid.
Stay relaxed and keep your back supple.
d) To further test your aids, slow down his walk with a stilled seat, but before he halts activate your driving seat to increase the tempo of his walk and lengthen his stride again.

Feel how using your seat aid regulates the tempo and rhythm of his footfalls.

Tension-Free Transitions: Three Trot Exercises

You and your horse will now be relaxed and supple after your walk work, and ready for trot.
1. Trot on a 20 Meter Circle

a) Shorten your reins couple of inches, apply the half-halt, and use your driving seat to transition into posting trot from the walk.
Again, you may need to back up that initial request with some leg pressure.
b) Trot on a 20 meter circle to the left.
It’s easier to control the horse’s speed when on a circle than on straight lines.
c) When posting to the trot, your passive and driving seats won’t come into play. (They are effective at the sitting trot, which comes later in your training.)
Instead, use the rhythm of your posting to create an even one-two-one-two rhythm in the trot. Counting out loud really helps achieve a steady tempo.
If it’s too slow, rise a little faster. If the horse is rushing, deliberately slow down your posting. Your horse will respond to your rhythm.

2. Changing Rein
Once you’ve established your horse’s trot rhythm on the left rein (i.e. riding to the left) it’s time to ‘change rein across the diagonal’ and ride in the other direction.
The usual way is to change rein across the ‘long diagonal.’

a) Draw an imaginary line across the arena rectangle to divide it into two equal triangles.
“Changing across the diagonal” involves riding along that imaginary line to switch the direction of travel. This is the long diagonal.
As you trot across this line, remember to change your posting diagonal by sitting for one stride halfway along it. This mid-point is known in dressage as ‘X.’
You’ll now be on the correct diagonal (rising out of the saddle when the horse’s new outside foreleg moves forwards) as you reach the other side of the arena.
b) Trot a 20 meter circle in your new direction.
Concentrate on moving forwards in a solid one-two-one-two rhythm, so that you and your horse can continue to loosen up and relax.
c) Change rein frequently across the diagonal. This prevents you both from getting too comfortable on one rein and neglecting the other.

3. Transitions from Trot to Walk
Transitioning from trot to walk tests how well your horse is listening to you.

a) While on your 20 meter circle, apply your half-halt and slow down your posting. As your horse reduces speed, sit in the saddle instead of rising and apply your stilled seat.
Your horse will transition down from trot to walk.
b) Walk for half a circle then ask him to trot again.
c) Alternate between walk and trot on both reins.
d) Change rein across the diagonal in walk sometimes and ask for trot on the circle in your new direction.

Mix things up, as this will keep your horse listening and always ready to obey new commands.
Work on the smoothness of your transitions between gaits and into halt, and end each riding session with 10 minutes in walk. This lets your horse get his breath back and allows his muscles to wind down.

These exercises will help you stay stress-free, while creating the harmonious relationship with your horse which is the foundation of all dressage.

Posted in: Dressage, Equestrian News

Leave a Comment (0) →

Dressage Horse

Do You Need a Special Horse for Dressage?

Training dressage can be an end in itself, or part of the horse’s education in another equestrian discipline. Your ultimate riding goal will determine which equine type best suits your dressage needs.

Here are some common situations where dressage is ridden, and a look at the appropriate horses for them.

The Beginner’s Dressage Horse

You don’t need a fancy horse for starting dressage: he only needs to be sound and able to walk and trot.

Even canter is optional at the very beginning level of competition. To encourage riders to enter shows, the USDF (United States Dressage Federation) has created three Introductory Tests. The first two only require walk and trot, with canter added in the third.

You can then move up to the next level as your equine partnership progresses.

The More Advanced Dressage Horse

If you want to ride at the upper dressage levels, you’ll need a more specialized horse. His conformation (build) must enable him to perform lateral movements (forwards/sideways) and collected (more compressed) work. All three of his gaits must be pure, and he needs the temperament to deal with the stress of difficult, sustained work.

You have a choice of proven dressage breeds which include the German, Swedish or Dutch Warmbloods, together with the Thoroughbred. The Friesian, originally bred as a carriage horse, is also becoming a winner at dressage shows.

Dressage and the Event Horse

If you’re a budding event rider, dressage is only one of three competition phases - the others being stadium jumping and cross-country. It takes a very versatile, athletic horse to perform well on the flat and over obstacles.

As long as he is fit, any type of horse can compete in low level events. But for the speed and stamina demanded at the upper levels, your best breed is the Thoroughbred or a horse with at least ¾ Thoroughbred in him.

Dressage and the Show Jumper

Another breed with the necessary aptitude is the Irish Draught horse crossed with the Thoroughbred, known as an Irish Draught Sport Horse. The sensible brain of the Irish Draught combines well with the athleticism and swiftness of the Thoroughbred to produce talented jumpers.Warmbloods and Thoroughbreds often have the right build for show jumping.

You’ll enjoy riding dressage on these breeds while you improve their agility round a course of fences and develop their jumping strength.

Dressage for Western and Gaited Horses

Can you ride dressage with your Western or gaited horse?

Most definitely!

Because it maximizes the riding potential of all horses, dressage is becoming widely accepted outside the sphere of English riding. Gaited and Western tests up to Third Level are now available.

The type of horse you need for riding dressage depends on your training goals. If you aspire to the higher levels of pure dressage, you’ll need a more specialized equine partner. But for the lower levels, or if you use the schooling as a foundation for other disciplines, your regular trail horse, jumper, gaited or Western horse should be more than capable.

Posted in: Dressage, Equestrian News

Leave a Comment (0) →

A Look at Dressage

A Look at Dressage, Part One: What Is Dressage and Why Do It?

My original sport was show jumping, and I thought dressage training entailed riding ever decreasing circles in the sand. Why would anyone pursue such a boring activity?

But dressage has since become my passion, and now I don’t understand why anyone would not include it in their horse training.

Dressage is the art of creating harmony between horse and rider. Surely that’s the aim of every horseman and horsewoman?

So What Exactly Is Dressage?

Far from being a monotonous repetition of artificial movements, dressage develops a horse’s natural athletic talents. From the French ‘dresser’ - meaning ‘to train’ – it fulfills the animal’s potential as a riding horse. Over time he is transformed into a supple, strong and willing equine.

Ideally, his schooling follows a structured program based on ‘The German Training Scale,’ also called ‘The Training Scale’ or ‘The Training Pyramid.’ The six phases of the German Training Scale flow logically from one to the other, with no rigid timetable.

Some horses move easily from one phase to the next, while some take longer or get stuck at a particular stage. If the animal encounters difficulties the answer is always to go back to basics until he is comfortable again.

The German Training Scale

Here is a brief overview of the six steps in the training pyramid. Each has the German term followed by its usual English translation.

Takt - Rhythm

The horse is encouraged to move forward (not rush) under a balanced rider, so he can find his natural rhythm. His gaits become regular in length, with the correct footfall. The gaits of an English riding horse are the four beat walk, two beat trot and three beat canter.

Often a horse has two ‘good’ gaits while one is lacking. For example, the canter may not be ‘pure’ – perhaps it is four beat instead of three beat. This beginning phase helps achieve purity in all three gaits.

Losgelassenheit - Relaxation and Suppleness, or Looseness

Now in a calm state, the horse can concentrate on his rider without anxiety or distraction. Signs that he is relaxed are snorting softly through his nose and beginning to stretch his neck down in walk, trot and canter. Another indication he’s loosening up is that he uses his back: it ‘swings’ as he reaches for connection with the rider’s hands through the bit.

Anlehnung - Contact

The horse now accepts bit contact – i.e. he’s comfortable with the even, gentle pressure of the bit in his mouth. His whole body softens as his hind legs increase their pushing power.

The rider should always ride ‘back to front’ – i.e. by activating the animal’s hind legs and encouraging him to step willingly into the bit contact. The horse’s mouth should never be pulled with the reins to force contact.

Schwung - Impulsion

The forward thrust flowing from the animal’s hind end is contained in front by the rider’s steady yet sympathetic hands. This creates impulsion. The horse’s whole body now becomes supple and elastic as he moves towards the state of Durchlässigkeit, or ‘being through.’

Here is a helpful video of international dressage rider Lisa Wilcox demonstrating how to achieve Throughness. (She is not wearing a helmet, but please wear one when you ride!)

Geraderichtung - Straightness

Every horse is somewhat crooked. This is partly due to the fact that his hind end is wider than his front. His haunches tend to swing to one side, so in this fifth phase he learns to move in a straight line, by placing his hind legs directly in the traveling path of his forelegs.

The total weight is then distributed more evenly over the animal’s body, creating a balanced horse. His strides become increasingly powerful as all his energy is channeled forwards.

Another reason for straightness is to reduce uneven wear and tear on the horse’s limbs.

Versammlung - Collection

Only when the horse is straight and balanced is he ready to begin collected work.

His thrusting strides are now shortened without losing rhythm and regularity, and exhibit extra energy and activity. Over time his hind legs become stronger, taking more weight and thereby lightening his forehand. He is then able to perform the higher levels of movement.

These include piaffe (trotting in place with impulsion) and passage (trotting slowly forward with high, prolonged steps) and canter pirouettes (180° or 360° pivots on the hind legs in canter).

Such movements demand a high level of strength and training, and a horse should never be asked for collection before he is ready.

Why Do Dressage?

The process of creating a capable and willing equine partner is enormously satisfying. A horse well-schooled in dressageis both a joy to ride and enjoys being ridden.

Dressage competitions offer an opportunity to showcase the harmonious partnership between horse and rider, and demonstrate their athletic skills.

This type of training provides the ideal preparation for other riding disciplines, too.

Show Jumping

Show jumping riders school their horses in dressage to develop the balance and strength the animals need to negotiate fences successfully. They become tuned in to their riders, and can easily obey requests to adjust their strides before a jump or make tight turns for the jump-off.

Eventing

Dressage is a vital stage of one and three day events. An event rider, who jumps clean in the cross country and stadium phases but places low in the dressage, has no hope of winning. For good reason is it said that one day and three day events are won or lost in the dressage.

Western and Gaited Riding Disciplines

Western and gaited horse riders are also warming up to dressage. The USDF (United States Dressage Federation) competitions used to be tailored to English riding only, but the tests are now being adapted to suit these other equestrian styles.

This system of training is becoming increasingly popular as more people understand its value for every riding horse.

To the uninitiated, like my former self, dressage might appear to be senseless routine. But the exact opposite is true. It develops physically fit equine partners, willing and able to perform their best. Carried out correctly, dressage creates a win-win situation for both horse and rider.

Posted in: Dressage, Equestrian News

Leave a Comment (0) →

Journey to Successful Recovery Part 4

Getting Your Horse Back Into Work after a Tendon Injury

Part Four: The Journey to Successful Recovery

When your horse pulls his tendons, doubt nags at you constantly: even after months of patient equine rehabilitation, will your beloved animal ever fully recover?

I went through the same anxiety with Double Clover, my big gray gelding, after he severely pulled both his front tendons. Hopefully his story will keep you optimistic about your own horse’s chances of healing.

Bad Horsemanship…

I should have realized the Irish Sport Horse’s injuries were inevitable from observing his owner’s disastrous concept of horse care.

When I arrived to try the horse, the farmer pulled the five year old out of his dingy, poop-filled stable, let him loose in a small arena and chased him with a whip.

While the gelding bucked and galloped round the ring, I learned he’d been left in his stall for several days. The farmer normally rode him three times a week to round up cattle and never turned him out to graze.

The tall farmer now caught the heaving horse, threw a saddle on his back, jammed a bit in his mouth, and a bridle over his head. He then leaned across the animal and swung his right leg over the saddle. Once upright, he kicked Double Clover in the ribs and they took off at a gallop across extensive farmland.

They roared back a few minutes later, and when I got on him, the poor horse didn’t realize he was allowed to walk. He immediately trotted, and needed much persuading that he wouldn’t get into trouble if he transitioned down to first gear.

Yet the Irish Draft/Thoroughbred Cross’s lovely temperament had not been ruined, despite his owner’s dubious training methods, so I bought him.

…Leads to a Bad Breakdown

Back home I was careful to put Double Clover on a gradual training program, which included walk work on our freestyle horse exerciser and under saddle. He enjoyed daily turnout with my other horses and settled quickly into his new environment. His skinny frame soon filled out after I’d addressed his horrific worm burden.

A few weeks later, I began jumping him. Had his tendons been strong when I bought him, it would have been the right time to introduce this next phase. He loved his job, and was a confident jumper.

But suddenly his lower front legs swelled up, and the vet confirmed pulled tendons. I was horrified. I’d been so conservative with his training and couldn’t understand how this had happened until the vet assured me: “His tendons were going when you bought him.”

Background Check

Now it all made sense. No wonder his tendons were weak before he arrived at my barn - just look at the treatment from his previous owner:

  • Leaving him for days on end in a small and dirty stall which resulted in poor blood circulation in his legs.
  • Exercising him only three days a week, which is not nearly enough to get a horse fit in wind or limb.
  • Galloping him from a standstill every time he was ridden, with no walk work to warm up his tendons, ligaments and muscles. That is an absolute training no-no.
  • Not walking him afterwards to let his body recover from the exertion – another horse training error.
  • No turnout for physical relaxation and improved blood circulation.

The poor horse was doomed from the start.

If only I’d thought to have his legs checked before purchase! But hindsight wasn’t going to help. The issue now was, how serious were his injuries and would he ever recover from them?

The Long Road Ahead

If you’ve read the first three articles in this four part series, you’ll be familiar with the equine rehabilitation protocol I now had to follow.

After four weeks we took him for another ultrasound. The vet decided to split the more damaged tendon to increase blood flow to the injury site and improve the healing process. Today additional methods of promoting healing are open to the horse owner and here is an excellent article about alternative treatments: MDHorse The difference being that this happened almost two decades years ago, when ‘stall rest’ meant exactly that: the horse really had to stay in his stall for 24 hours a day during the first three months. Fortunately thinking has now changed, and usually horses can be hand-walked or put on the horse walker daily for a few minutes right from the beginning of their rehabilitation.

Luckily my equine patient had a great disposition and stayed calm in his stall. I rotated barn buddies to keep him company, and he had plenty of hay to munch and toys to play with.

Achieving the Goal

Double Clover’s period of complete stall confinement ended and I took him for another ultrasound.

While the vet examined the big gray’s legs, his assistant came in. She had a client on the phone, whose horse was beginning its walk phase after a tendon injury, the same phase I was about to enter with Double Clover. But the client had ‘accidentally trotted her horse’ and it was now lame. What should she do?

“Tell her the horse is now an insurance write-off,” was my vet’s terse response.

I was shocked, and immediately resolved to strictly follow my gelding’s prescribed rehabilitation program. I didn’t want him to become a write-off, too!

It took three more months of careful reconditioning, but Double Clover did return to full work. He became a wonderful show jumper, dressage horse and eventer. Impressed by this, one of the vets who’d taken care of him used his story for her case study about how a horse can recover completely after seriously damaging its tendons.

Eighteen years later, Double Cover is now twenty-three years old, sound and still competing in dressage.

So take heart: your horse’s career is not necessarily over if he pulls his tendons. Stay hopeful and be patient. Do exactly what your vet tells you and don’t attempt any short cuts.

You, too, could have a success story to share with other owners of injured horses.

Posted in: Equestrian News, Horse Care

Leave a Comment (0) →

Tendon Injury Part 3

Getting Your Horse Back Into Work after a Tendon Injury

Part Three: Transition to Canter, Plus Tips for Preventing Re-Injury

Your horse’s walk and trot reconditioning phases are successfully completed, and an ultrasound confirms his tendons are healing well. At last, you have the green light to canter!

But whether including this gait on the horse walker or under saddle, continue to be conservative. You don’t want to undo the successful equine rehabilitation work you’ve done so far.

Introducing the Canter

Your vet will probably want to add five minutes of canter gradually during the first two weeks. Begin and end every session with ten minutes of walk work, and split the total canter time allowed into short segments.

Also:

  1. Trot before and after cantering: don’t transition up to canter from walk, or down from canter to walk.
  2. Avoid abrupt changes of gait or direction.
  3. Don’t lunge your horse, as his tendons are not yet sufficiently conditioned for moving in circles of twenty meters or less.

Every two weeks, continue to increase the total time spent in this new gait by five minutes, or as your vet prescribes, until you reach twenty minutes of canter work during each one hour exercise routine.

Using the Horse Walker

The freestyle horse exerciser once again becomes a valuable tool. It allows you to control your horse on a gentle curve in a contained area, and you can gradually increase and decrease the speed for smooth gait transitions through trot. Putting a steady buddy on the horse walker with him will have a calming effect. Only canter your horse for this stage of rehab on exercisers with large diameters (65′ - 70′) with safe track footing.

Under Saddle

Your vet will ask you to continue riding in straight lines and on large circles, to minimize the stress on his tendons.

Another way to reduce tendon strain is to collect him. In the last post we talked about how collection is not just for dressage training – it benefits all horse disciplines. Here again is the link to an informative article on the correct way to collect your horse: Collection

Collecting a horse in canter makes sense, because it reduces the amount of weight on his forelegs.

Your horse’s rehabilitation is now complete. You’ve been patient and worked hard, and the chances are good that he will soon return to his normal work load.

Tips for Avoiding Tendon Re-injury

There are no guarantees your horse won’t injure himself again, but here are a few ways to help prevent another set-back. We’ve talked about some of them already.

  1. Always walk your horse for ten minutes before progressing to faster work.
  2. Always walk your horse for ten minutes after faster work.
  3. Avoid abrupt downward changes between gaits and sudden turns.
  4. Work your horse evenly on both reins. It’s tempting to concentrate more on his worse side, but overdoing this can lead to tendon and suspensory problems.
  5. Listen to your vet’s advice about turnout. Start with a small area, and maybe a mild sedative, and move to a larger paddock only when your horse is reliably quiet.
  6. Avoid turning him out in muddy areas where he can skid and pull that tendon again.
  7. Avoid trot extensions when your horse is tired.

Check his legs every day for unusual swelling or heat and call your vet if you notice anything wrong.

Posted in: Equestrian News, Horse Care

Leave a Comment (0) →

Tendon Injury Part 2

Getting Your Horse Back into Work after a Tendon Injury

Part Two of Four: Adding the Trot

In the previous post we examined the two walk phases of equine rehabilitation after a tendon injury, which included walking in hand, on the horse walker and under saddle.

When your horse is being ridden for sixty minutes a day at walk, and an ultrasound has confirmed that his damaged tendon is healing on schedule, it’s time to include trot in his routine.

How Much Trot?

Your vet will probably suggest trotting for five minutes in total during his one hour exercise routine, still working in straight lines and large circles.

Whether using the horse walker or riding, start each session with ten minutes of walk. This rule applies regardless of the horse training method, even when the animal is fit, as an equine athlete’s muscles and tendons need proper warming up to prevent injury or re-injury.

Introduce thirty seconds of trot at regular intervals between the walk phases, building up to sixty seconds during the first two weeks.

Gradually add five minutes every fourteen days, until you’re up to twenty minutes at the end of eight weeks – or other prescribed time period. Always call your vet if you detect any heat, swelling or lameness.

Starting with the Horse Walker

Your horse has been ridden under saddle for the past eight weeks. But all he’s done for four months is walk and the addition of trot could prove exciting for him.

With a european style horse walker, your horse can naturally move up from walk to trot in an enclosed space, and the partition will prevent him from gathering too much speed.

A calm equine companion will help your horse stay level-headed, and your control over the machine’s speed will enable gradual walk-trot-walk transitions.

Once he has settled down, you can progress to riding again.

Trotting Under Saddle

This walk and trot riding phase is an ideal time to work on collection.

Valuable for all horse riding disciplines, and not just dressage training, collection distributes weight more evenly over your horse’s four legs by shifting some of the load onto his hind end. The uncollected horse carries the greater proportion of his and the rider’s weight on his forelegs, which is especially undesirable after a tendon injury.

Collection also creates smoother, less ‘choppy’ gaits and transitions, further reducing tendon stress.

Here is a very informative article on achieving true collection (not the forced type, which makes the horse tense and rigid and more likely to hurt himself): SustainableDressage

If possible, ride with a friend on a quiet horse to keep yours calm until he gets used to this change in his daily exercise. You may want to use a stronger bit for extra control, or ask about a safe sedative for those first few trot rides.

Life is finally becoming more interesting for you and your horse. When an ultrasound of his injury shows sufficient healing, you’ll get the green light to include canter work. We’ll examine this in our next post, together with tips on how to prevent re-injury of the healed tendon.

Posted in: Equestrian News, Horse Care

Leave a Comment (0) →

Winter Horse Training

Starting Cold: Winter Horse Training Tips

As those of us in colder climates know, harsh winter weather can sometimes make riding unpleasant. While exercising and training your horse in cold weather, it is important to take extra care to ensure your horse is comfortable and adequately warmed to reduce the risk of injury.

Stretching is a simple and effective way to loosen up your horse prior to exercise and training. Although this is good practice year round, it is especially beneficial in cold temperatures. There are four primary stretches to consider implementing before putting your horse to work.

The first is called the “carrot stretch”. Use a carrot to stretch your horse’s neck both left and right. Then bring the carrot to his chest and down between his legs. Let your horse nibble a little of the carrot each time he does a full stretch.


There are two different simple back stretches. I recommend trying both, initially, to learn which stretch your horse responds to best. One type of back stretch is the “belly lift”. Use a firm object, such as the blunt handle of a hoof pick, and run it along the midline of the belly with slight upward pressure. The horse should respond by lifting his back. Repeat this two to three times. See below left picture.

The second type of back stretch is called the “butt tuck”. Again with a blunt object- this time one in each hand- apply slight pressure at the rump with your hands on either side of the back bone, and run down the back of the hindquarters. Be careful when performing either back stretch as sometimes the horse may kick out, especially one with a sore back. Talk to your horse, stand close, and apply increasing pressure slowly. See below right picture.


Next, stretch each of the front legs. Holding the front leg, stretch forward and down for about five seconds. Now, holding the leg level just behind the carpus (“knee”), rotate the leg in a small circle toward the other leg two to three times. Repeat both these stretches with the other front leg.


To stretch the back leg, pick up the leg and gently stretch back, then forward, then across the belly towards the other leg. Hold each stretch position for about five seconds before moving to the next position. Again, repeat with the opposite leg. It is imperative not to over-stretch the legs as this can cause strain on the muscles, ligaments, or tendons. A gentle pull until the leg naturally stops is all that is needed.


Another great way to beginning warming up your horse before you get on to ride is to use a Back On Track Mesh Sheet or Fleece Sheet. The Back On Track sheets are designed to reflect the horse’s body heat back onto him, heating up the muscles in the shoulders, back, and butt. They are great for horse’s with sore muscles, those in heavy training, and those with cold backs. A good alternative to a Back On Track sheet is to use a heating pad on the back for about 10 minutes prior to exercising.

Even after stretching and heating the back, it is critical to slowly and thoroughly warm up your horse. Allow time for the rest of your horse’s body to warm up in unison for superior performance and to prevent injury, especially to tendons and ligaments. It is best to start with a cooler on your horse at a forward, working walk for at least five minutes or more, depending on how cold it is and how stiff your horse might be. When starting at the trot, start at a long and low steady pace before asking for a collected or extended trot.

Giving your horse adequate time to warm up at his own pace will keep him happier and healthier. It may help an especially back sore horse to warm up with you off his back in a two-point position or standing straight up in the stirrups. On especially cold days or for horses that tend to be chilly, a fleece quarter sheet can help keep your horse warm, loose, and comfortable.

It is just as important to properly cool your horse off as it is to warm him up. You can never put a horse away that is hot or sweaty as this can lead to serious health problems. After exercising, it is good practice to again let your horse trot long and low to stretch out his back and neck. Once at the walk put the cooler back on and walk at a relaxed pace for 10-15 minutes. This will allow the heat the leave the muscles slowly. Using a horse walker or hot walker is the best way to cool off your horse safely and efficiently in all seasons.

After this cool down period, if your horse is still sweaty you can either hand walk him or put him in his stall to dry off with a fleece or wool cooler or dress sheet. Rubbing the sweaty areas with a towel will speed up the drying process. Also, placing an Irish Knit beneath a cooler puts a pocket of air between the horse and the cooler, which will help a sweaty coat dry more quickly. Once dry, you can proceed with your regular grooming routine and put blankets back on if your horse has them.

Regardless of weather or season, it is important to care for your horse’s legs by wrapping after especially hard training sessions. In the winter, I tend to stay away from poultice as it is already so cold. Instead, I spray liniment or a 50/50 mix of wintergreen rubbing alcohol and witch hazel (which works just as well as store bought liniment) on the legs prior to applying standing bandages. Spraying liniment or 50/50 on sore muscles will also make your horse more comfortable and ready for work the next day. For horses with sore feet, packing the feet at night will greatly help to eliminate the soreness.

Horses require an extreme amount of commitment and care in all seasons. Each season requires a little extra specialty care. Follow these tips and both you and your horse will be sure to have a warm, happy and healthy winter season

Posted in: Equestrian News, Horse Care

Leave a Comment (0) →

Tendon Injury Part 1

Getting Your Horse Back into Work after a Tendon Injury

Part One of Four: The Walk

Thankfully horses are no longer automatically condemned to stand for months in their stalls immediately after pulling a tendon. If the severity of the tendon injury allows, many vets advocate walking a horse in hand or on the horse walker in addition to stall rest during the recovery process.

The First Two Months

Your vet will probably prescribe twenty minutes of walk a day, adding five minute increments each week until you are up to one hour at the end of eight weeks.

Standing in a stall all day is boring and stressful for horses. Whenever possible - and with your vet’s agreement - divide the permitted exercise period into two daily sessions. Your equine patient will benefit greatly from this.

Add soothing activities such as daily grooming, and ask about appropriate massage and stretching techniques. Your horse will quickly associate your visits not only with a chance to get out of his stall: he’ll also look forward to relaxing with you inside it. If you perform this ritual before taking him for his daily walk, he’ll stand still for you and not be inclined to rush out of his stall as soon as you arrive.

Using a Horse Walker

A european style horse walker is ideal for beginning your horse’s walking program, as it allows him to move naturally within a restricted area. Your vet will stipulate working in straight lines or very large circles, so the wider the circumference of the horse walker, the less stress placed on the tendon injury. A horse exerciser roof cover over the track is an added bonus when the weather is inclement.

Consider putting a calm horse buddy on the walker with him for companionship, and you may want to ask your vet about giving him a mild sedative. The most commonly used one is acepromazine, colloquially known as ‘Ace.’

Keep an eye on him the whole time during his exercise.

Hand Walking

When a horse exerciser is not available or you prefer to walk your horse in hand, don’t be tempted to use the halter, no matter how quiet he normally is. He’s not getting any turnout and will probably be frustrated by his cramped lifestyle, so use the bridle for extra control. A mild sedative (as mentioned above) may also be appropriate.

Walk him on flat surfaces with level footing and consider putting on brushing boots for added protection.

Now is not the time to save money on farrier’s fees: be sure to keep your horse’s feet well-trimmed and/or shod, depending on his usual requirements.

Discontinue exercise and notify your vet immediately if you notice any swelling, heat or lameness.

The Next Two Months

After the initial weeks of mild exercise, your horse will have another ultrasound to ensure his tendons are on the mend. All being well, he is ready to progress to the next step.

Equine rehabilitation is a long process, so don’t be disappointed when your vet decrees yet another two months of walk. At least you can now start riding!

This is a useful time to improve your position in the saddle and get more in tune with your equine partner.

You can also put him back on the horse walker, but place a substantial weight on his back, such as a heavy Western saddle, until you move on to riding him.

Once again, you’ll probably start with twenty minutes, increasing by five minutes per week, to allow the tendons to strengthen under the extra weight. You’ll be back to sixty minutes of walk at the end of this phase.

Exercising Under Tack

You may feel safer beginning your under saddle work with a competent friend walking alongside, holding an attached lead rein for maximum control.

The best method of fastening the lead rein to the bridle is with a lead rein coupling, which attaches separately to each bit ring. This is available online at a reasonable price, and also known as a Newmarket coupling.

Or you can thread the lead rein through the bit ring on the left and clip it onto the right bit ring. Don’t clip it to only one bit ring, as this will cause your horse great discomfort.

In the event that you have no one to help during these first few rides after his injury, consider using a stronger bit, or a double bridle if your horse is used to wearing one. You’ll feel more relaxed in the saddle and help your mount chill out, too.

Just Walking – Really?!

The walking phases of equine rehabilitation quickly become boring: once you’re in the saddle you may be tempted to trot, ahead of your vet’s schedule.

But remember, in addition to the tendons your horse damaged, his muscles and other ligaments have also become weaker through lack of real work. They will remodel and strengthen during the course of his planned exercise regime, but you must give them sufficient time to adjust to their increasing workload. If you ask your horse to perform above his fitness level, you will do further injury.

I once watched a frustrated owner ask her horse to trot too soon, and he immediately became lame. Instead of competing again, he turned into a pasture ornament for the rest of his life. Her months of work up till then were wasted - not to mention her vet’s bills.

Patience is the keyword. It is vital to follow your vet’s advice to the letter. Keep the end goal in mind, work diligently through the program and give your horse the best chance of returning back to his former self.

Until your vet says otherwise, your horse needs to stay on stall rest except for when he is being exercised. Turnout is not a good idea: horses’ high spirits can lead to re-injury just as they are beginning to heal.

What If My Horse Does Something He Shouldn’t?

With all this talk about controlled exercise, no turn out and keeping your horse calm so his tendons can heal, it’s easy to become a nervous wreck if he does happen to get away from you or have a bucking fit.

Stay calm and call your vet before continuing with the exercise program. Don’t panic: most likely no real damage will have been done.J

At the end of this second walk phase your vet will perform another ultrasound on the injured tendons. If the healing process is continuing as expected, it is time to add the trot, which we’ll examine in our next post.

Posted in: Equestrian News, Horse Care

Leave a Comment (0) →

Winter Horse Care

Horse Care Mistakes to Avoid this Winter

With Jack Frost on his way, another winter is upon us. And while many of us prefer to avoid the blustery weather and stay warm inside, horse owners don’t have that luxury. It is important to maintain proper care for our equine friends during the winter season. Below, I’ve provided five basic winter horse care tips on caring for your horse during the cold winter months:

Frozen Water

Even though the heat of the summer is over, it is still important that your horse stays hydrated; which isn’t possible if his water freezes. This isn’t as common of a problem for horses that are stabled through the winter, but it’s of utmost concern for horses that are always outside. There are water heaters made specifically for outdoor water buckets, so you’ll never have to worry about your horse not having access to liquid water. If this is not an investment that interests you, be sure to check the water at least once a day to ensure it is not frozen.

Increasing Feed Rations in Cold Weather

Horses (like humans) burn more calories in the cold winter temperatures in order to stay warm. A great way to ensure that your horse stays warm on those especially crisp days and cold nights is to provide extra hay. Hay is the best way to keep the horse’s digestive furnace burning. If your horse is does less work or gets less exercise in the winter, consider reducing or eliminating grain and increasing the hay ration.

Exercise

Logically, it is very important to continue to exercise your horse regularly during the winter months. For those owners with access to an indoor arena, this is not typically a problem. Owners who do not have a place to ride may want to consider investing in a horse exerciser or horse walker. This equipment can provide a great alternative to an indoor arena, especially the track covered horse exerciser.

When it’s cold, it is critical that you provide ample time for your horse to warm up and get loose before putting him to work. For horses that are back sore or tend to be extra stiff in the cold, put a heating pad on his back for 10 minutes prior to exercise. This will help him warm up faster and make him more comfortable. It is essential not to over work a horse in the winter, because the cold can greatly increase his susceptibility to tendon and ligament injuries. If your horse is out of shape, be sure to ease into workouts and slowly increase your exercise regime. Lastly, it is equally necessary to allow plenty of time for your horse to cool down slowly before putting him out or back into his stall. A quick transition from hot to cold will make your horse stiff and can cause muscle and joint pain and tenderness.

Blanketing

Whether or not to blanket your horse is often controversial. The quick answer is that it depends both on the horse and the situation. A horse that is worked throughout the winter, especially one that is body clipped or trace clipped, needs to have both sheets and blankets. Older horses, sick horses, or thin rescue horses may require the extra warmth a blanket offers in the colder months. Healthy horses that live outside in the winter really do not require a blanket, as their thick natural coat is designed to keep them warm, even when covered in snow. Although they may feel cold to the touch, remember that their insulating layer traps heat next to the skin. Be sure, however, that they have some form of wind break, shelter or run-in shed in which they may take refuge from the elements.

Grooming

Grooming in the winter is still necessary to keep your horse’s coat healthy, and it is a great way to enjoy the company of your horse if you are unable to ride. So bundle up and go enjoy the fresh (albeit cold) air with your horse this winter!

Posted in: Equestrian News, Horse Care

Leave a Comment (0) →

WINTER TRAINING TIPS

Horse Exercise Winter Training Tips

Winter Horse Training

Winter is on the horizon. This is not always the best time for horses to exercise and ride. You might see this as a good time for you and your horse to hibernate indoors, enjoy the holidays and relax. Planning some time for fitness and exercise will help your horse retain some muscle tone and endurance, minimizing risks for injuries in the more accommodating spring weather.

Surfaces

One of the disadvantages to exercising outdoors in the wintertime is that ground surfaces can be uneven. This gives your horse more opportunity to strain tendons and muscles as you ride. Spending less time on your horse lowers the chances of muscle strain, but riding less can minimize exercise and cause a loss in muscle tone. Stick to locations with a reliable footing surface to lessen the risk without taking fitness out of the equation.

Exercising Without Riding

Using a horse exerciser is one way to ensure that horses get enough physical exercise to prevent loss of muscle tone and strength during the winter months. While many horses are given time off in the wintertime because there are no shows or upcoming competitions, it’s still important for them to stay physically fit. Letting them stay in the stable and eat hay may be relaxing, but it will require extra efforts come springtime. A daily exercise routine without riding can do just that.

Inclement Weather

If cooler temperatures and poor weather conditions due to precipitation happen more often than not, you may wish to keep your horse indoors or in a protected area. Providing ample warmth and an opportunity to get exercise to walk or run and stay warm and dry are also options, however. Using an indoor arena during the winter months can prevent outdoor discomfort for your horse, as well as for the trainer, while keeping those extra pounds at bay.

Daylight

Limited time availability during daylight hours can also put a damper on winter exercise. Set a consistent routine for your horse to have ground training and exercise, even when you’re not available to ride or the weather isn’t cooperating.

For horses that have a minimal exercise routine during the winter months, it’s important that they receive a body conditioning score before planning out their springtime workouts. Finding out what its needs are can help you create a balanced plan that will help in conditioning and achieving the proper weight for shows and competitions.


Posted in: Equestrian News, Horse Exerciser

Leave a Comment (0) →